01
Implementation Guide
Boston Family Lottery System
Access the Google Sheets template - Make a copy to start
Key Objectives
We propose using Google Apps Script to partially automate select steps of the presale workflow, specifically ID validation, data cleaning, applicant randomization, winner selection, and email notification for winners.
One-time Setup: Connecting Firebase to Google Apps Script
1
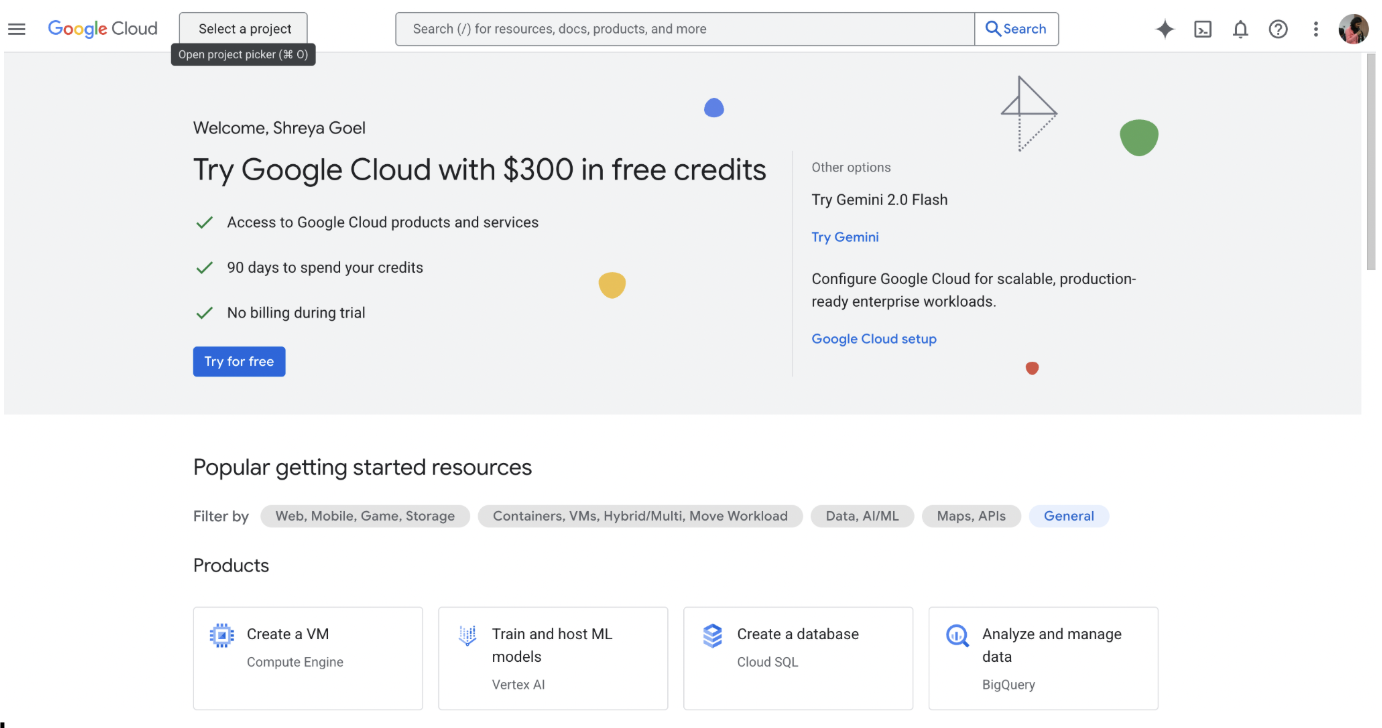
Step 1: Go to the Google Cloud Console
2
Step 2: Click 'Select a Project'
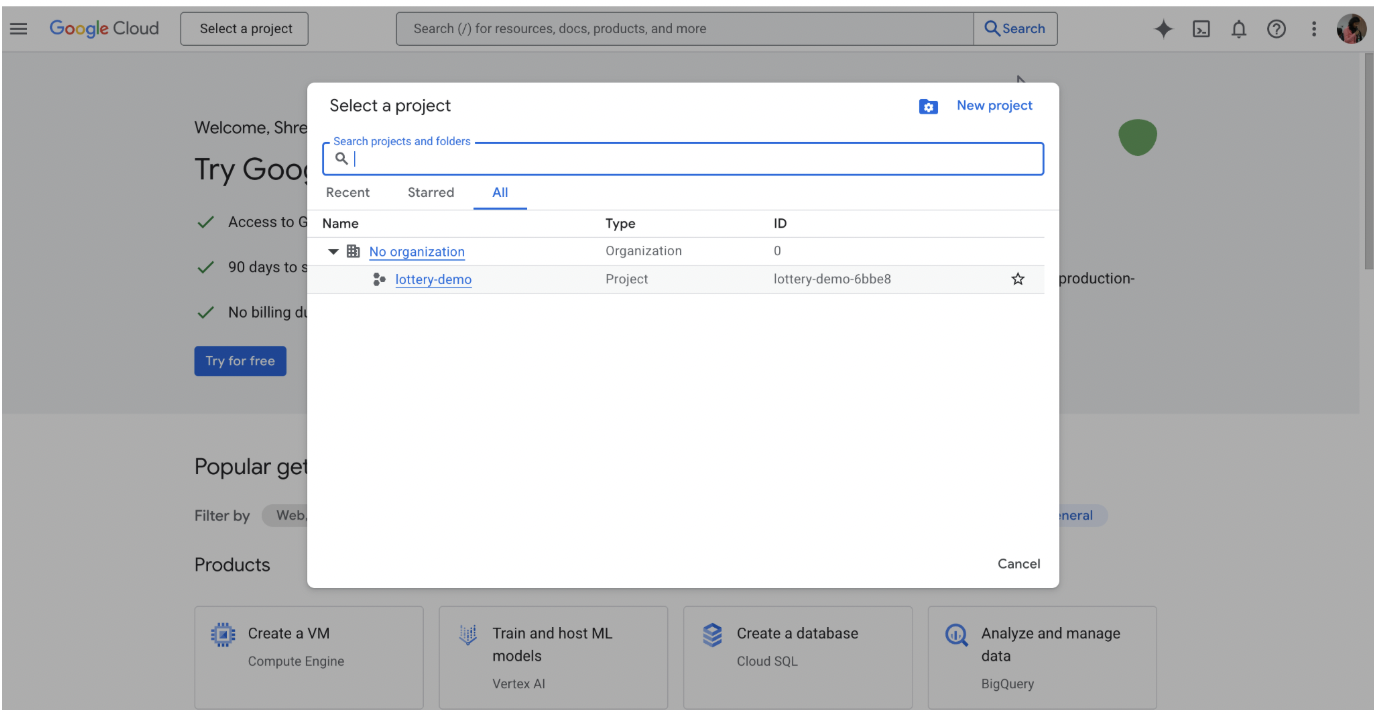
3
Step 3: Select the Firebase data for Boston Family
Days
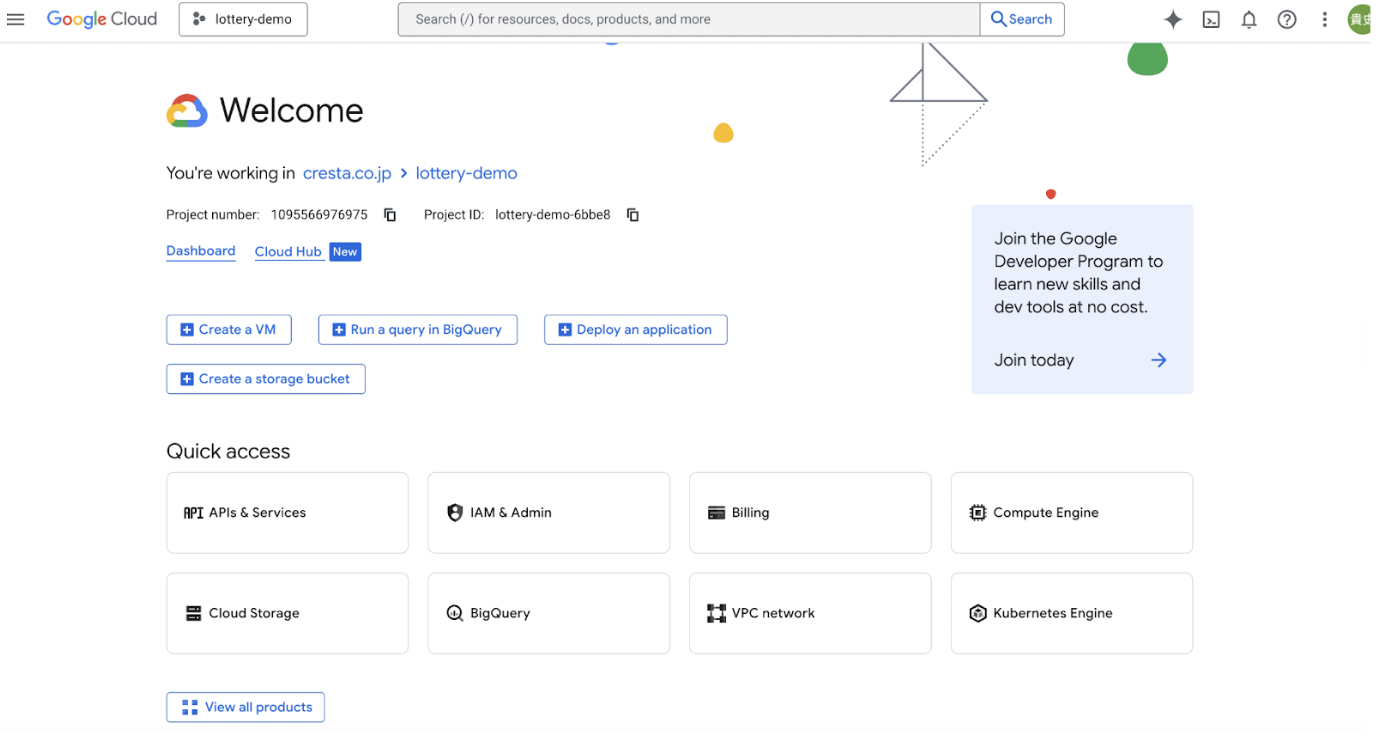
4
Step 4: Under "Quick Access" on the Welcome page, select
the "IAM & Admin" folder
5
Step 5: Select the Service Accounts tab on the left-hand
side of the screen
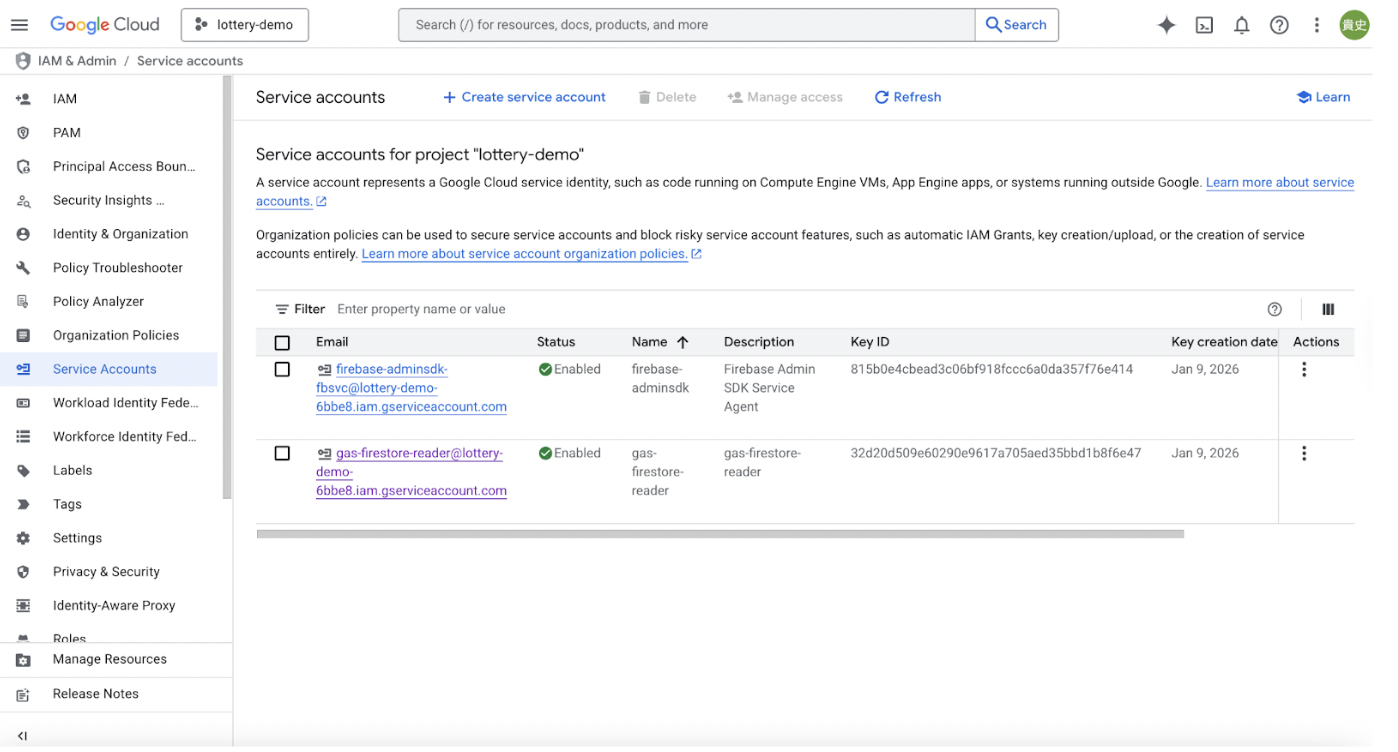
6
Step 6: In the Service Account tab, click on "+ Create
service account" and fill in the Service account
details
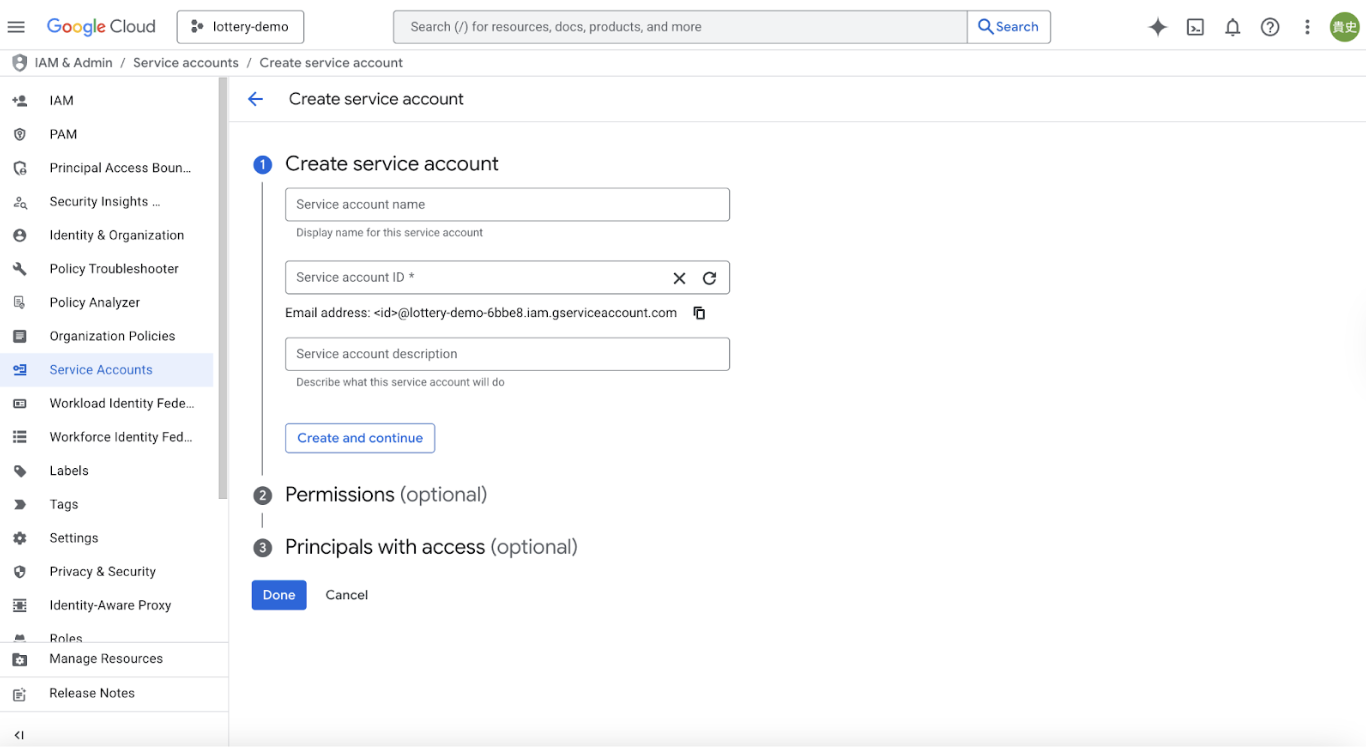
7
Step 7: Under Permissions, in the "Select a role"
dropdown, select "Cloud Datastore User"
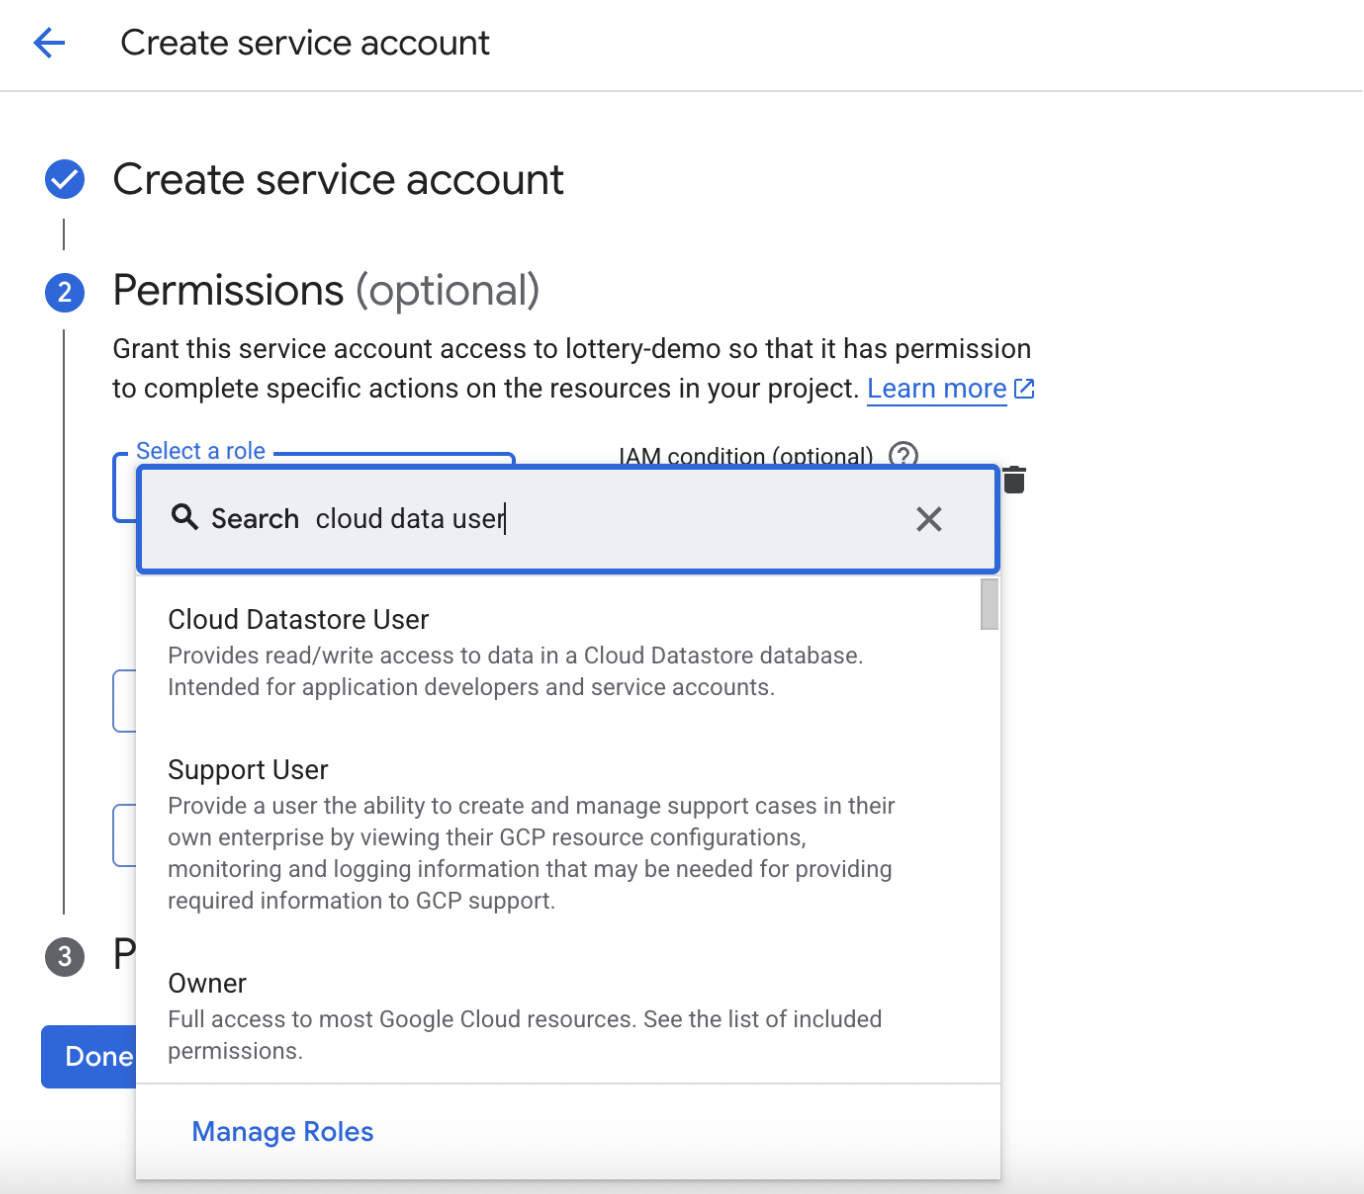
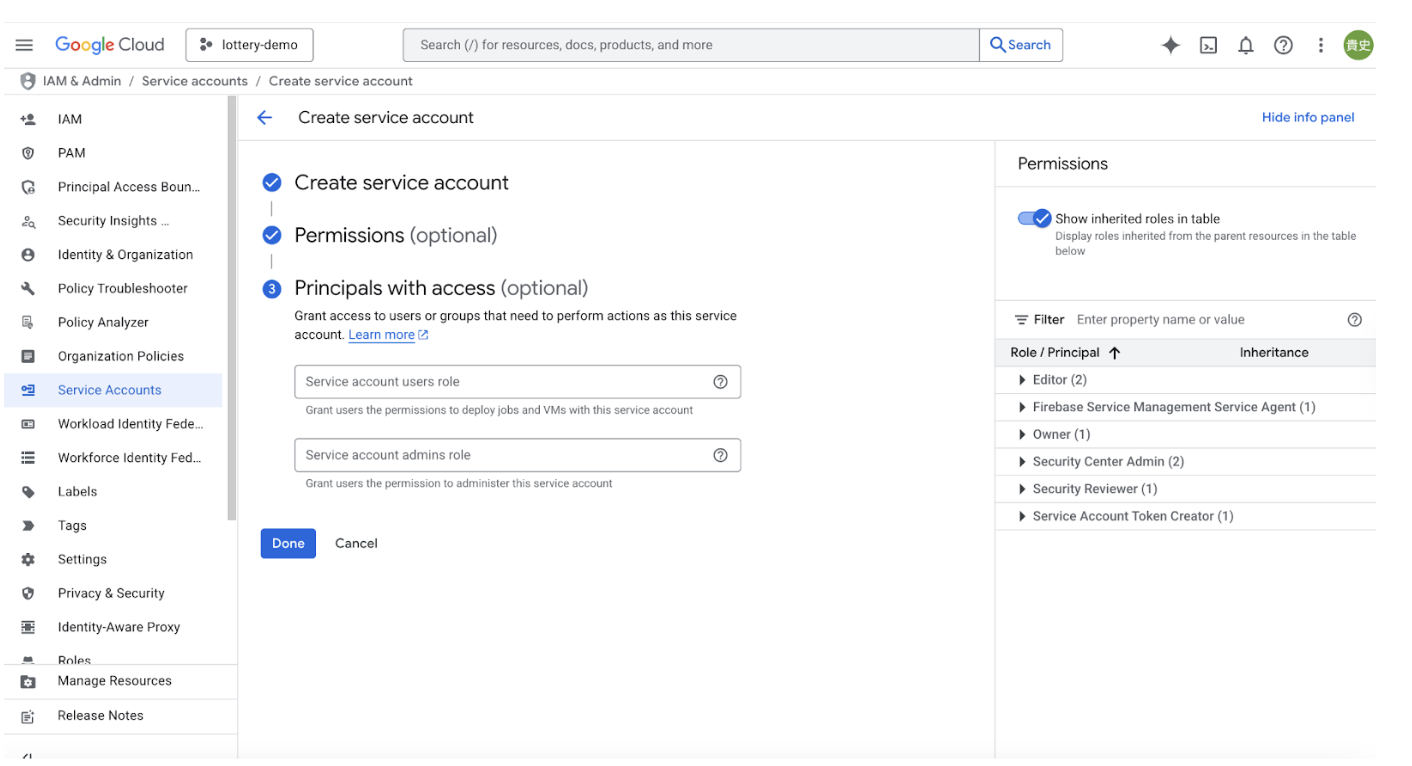
8
Step 8: Click "Done." The last section, "Principals with
access," is optional
Setting up the workflow
1
Step 1: Make a copy of the file 'Boston Family Days
Lottery System'
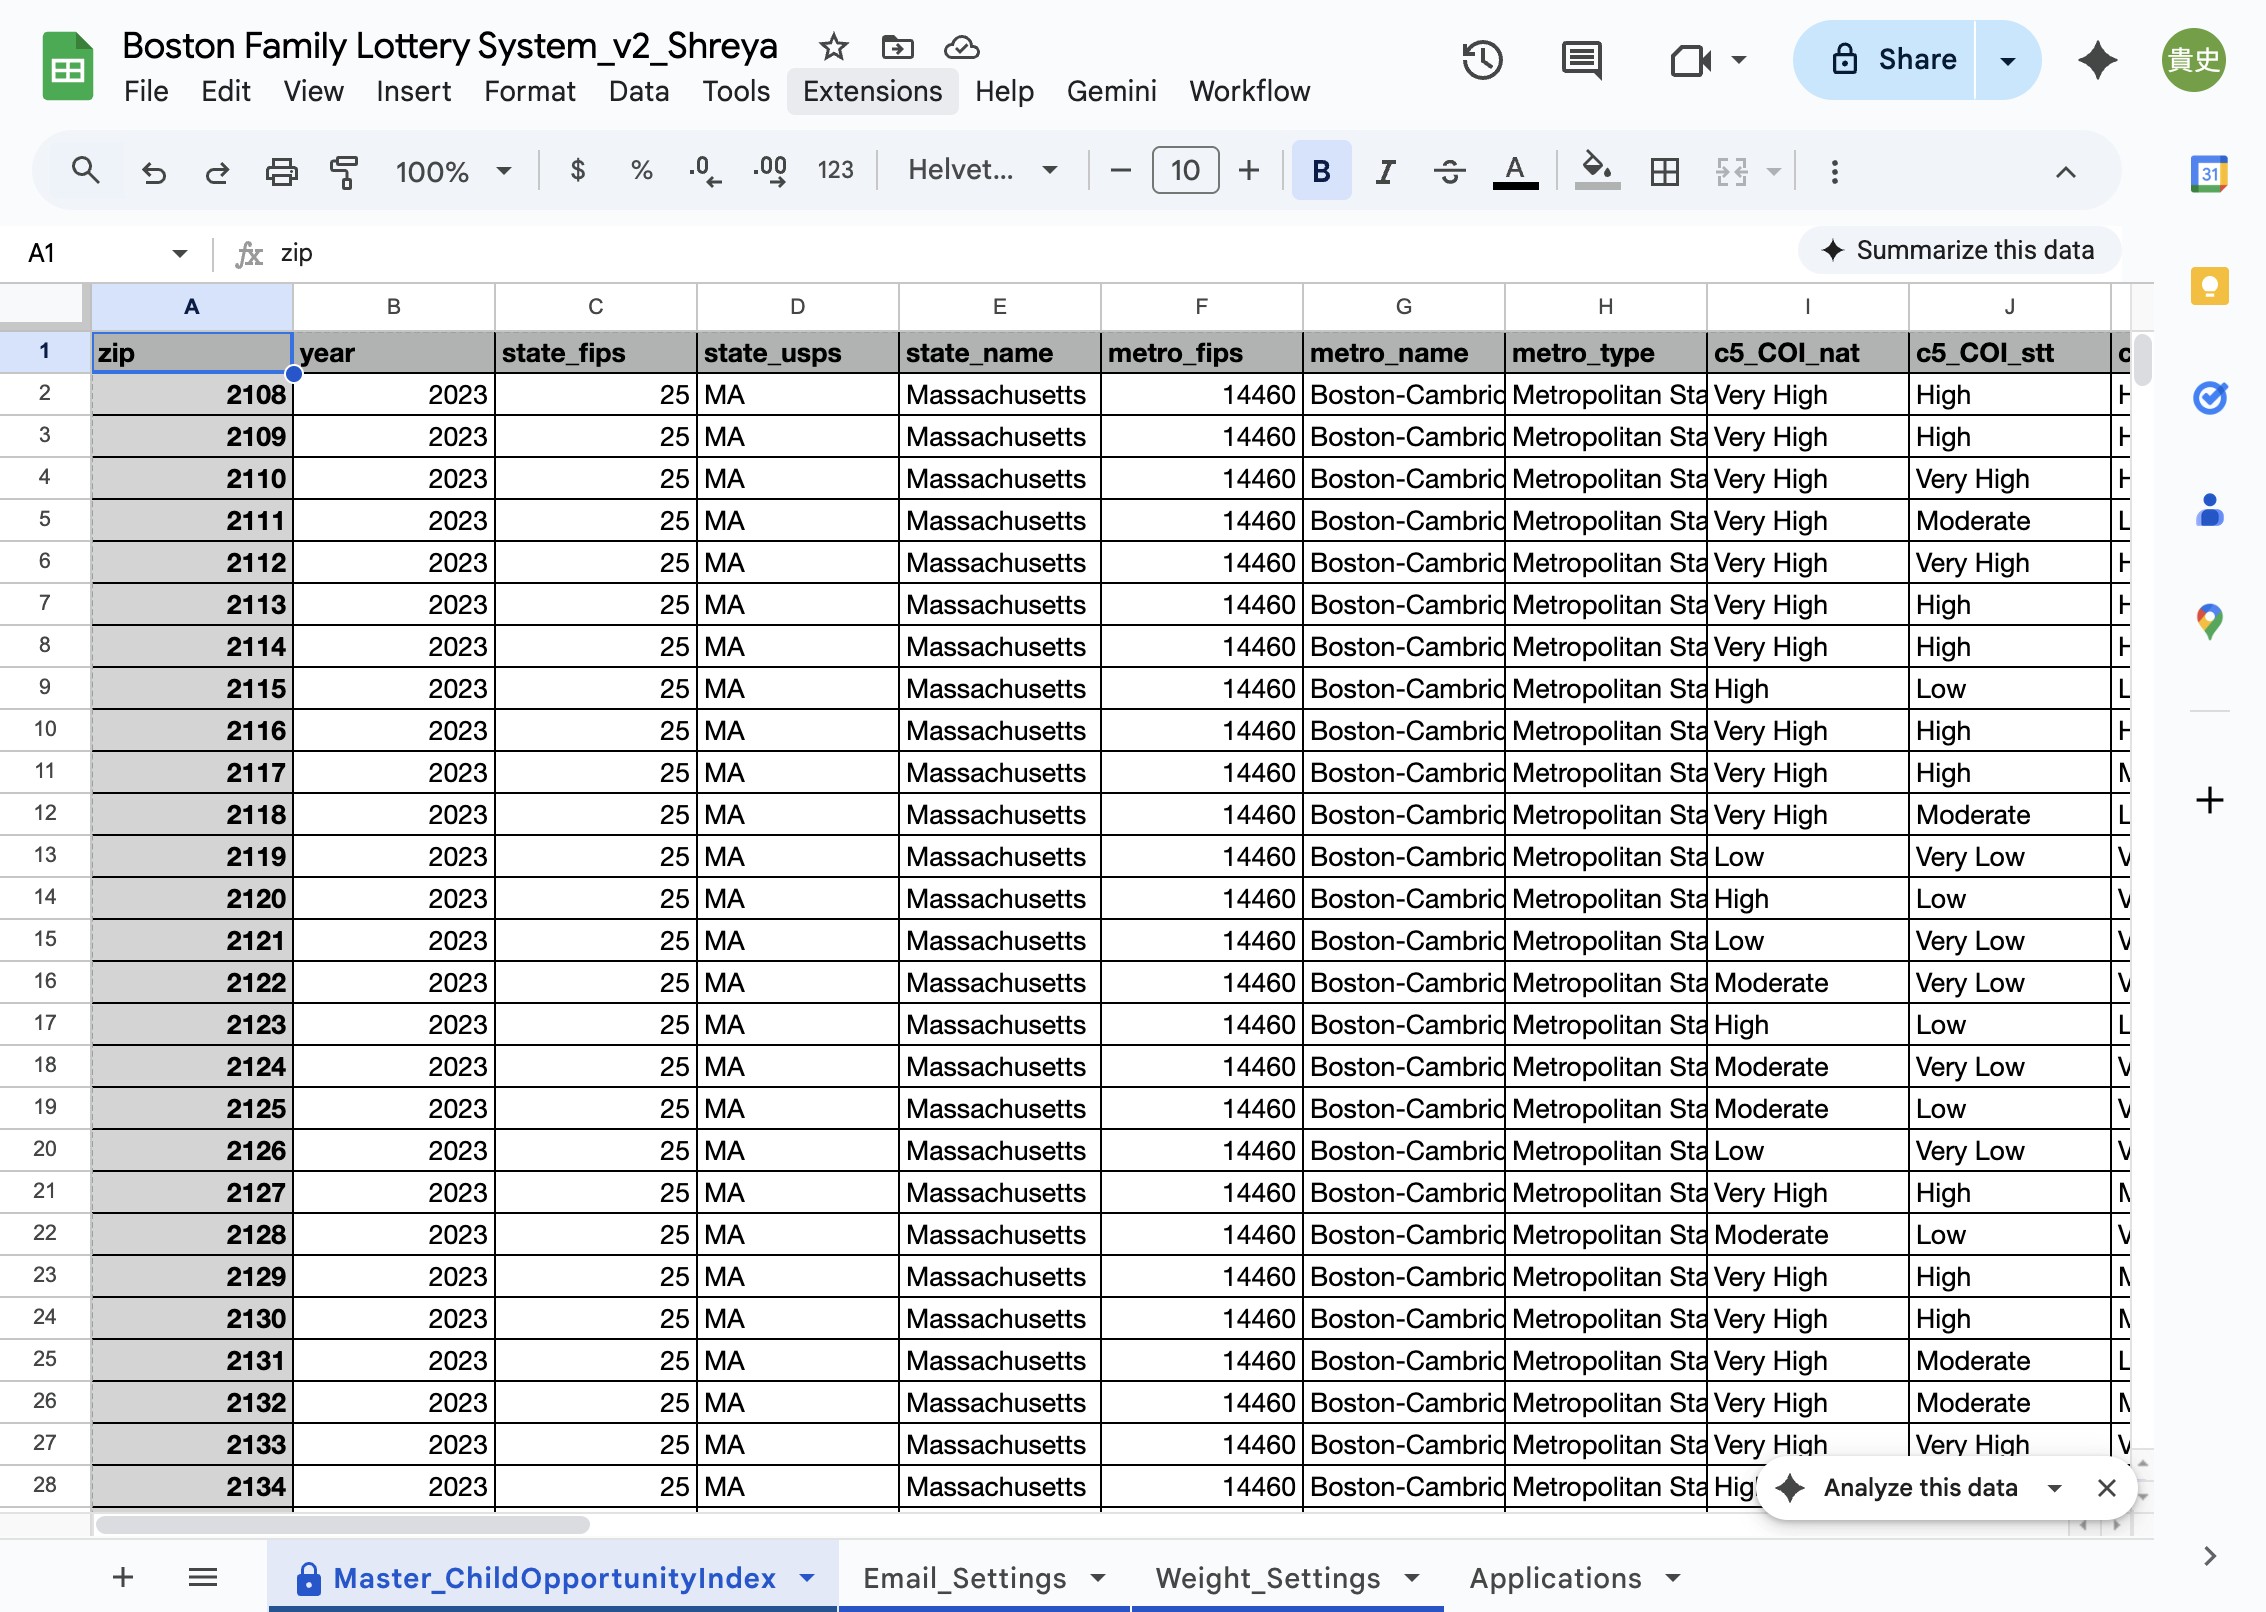
2
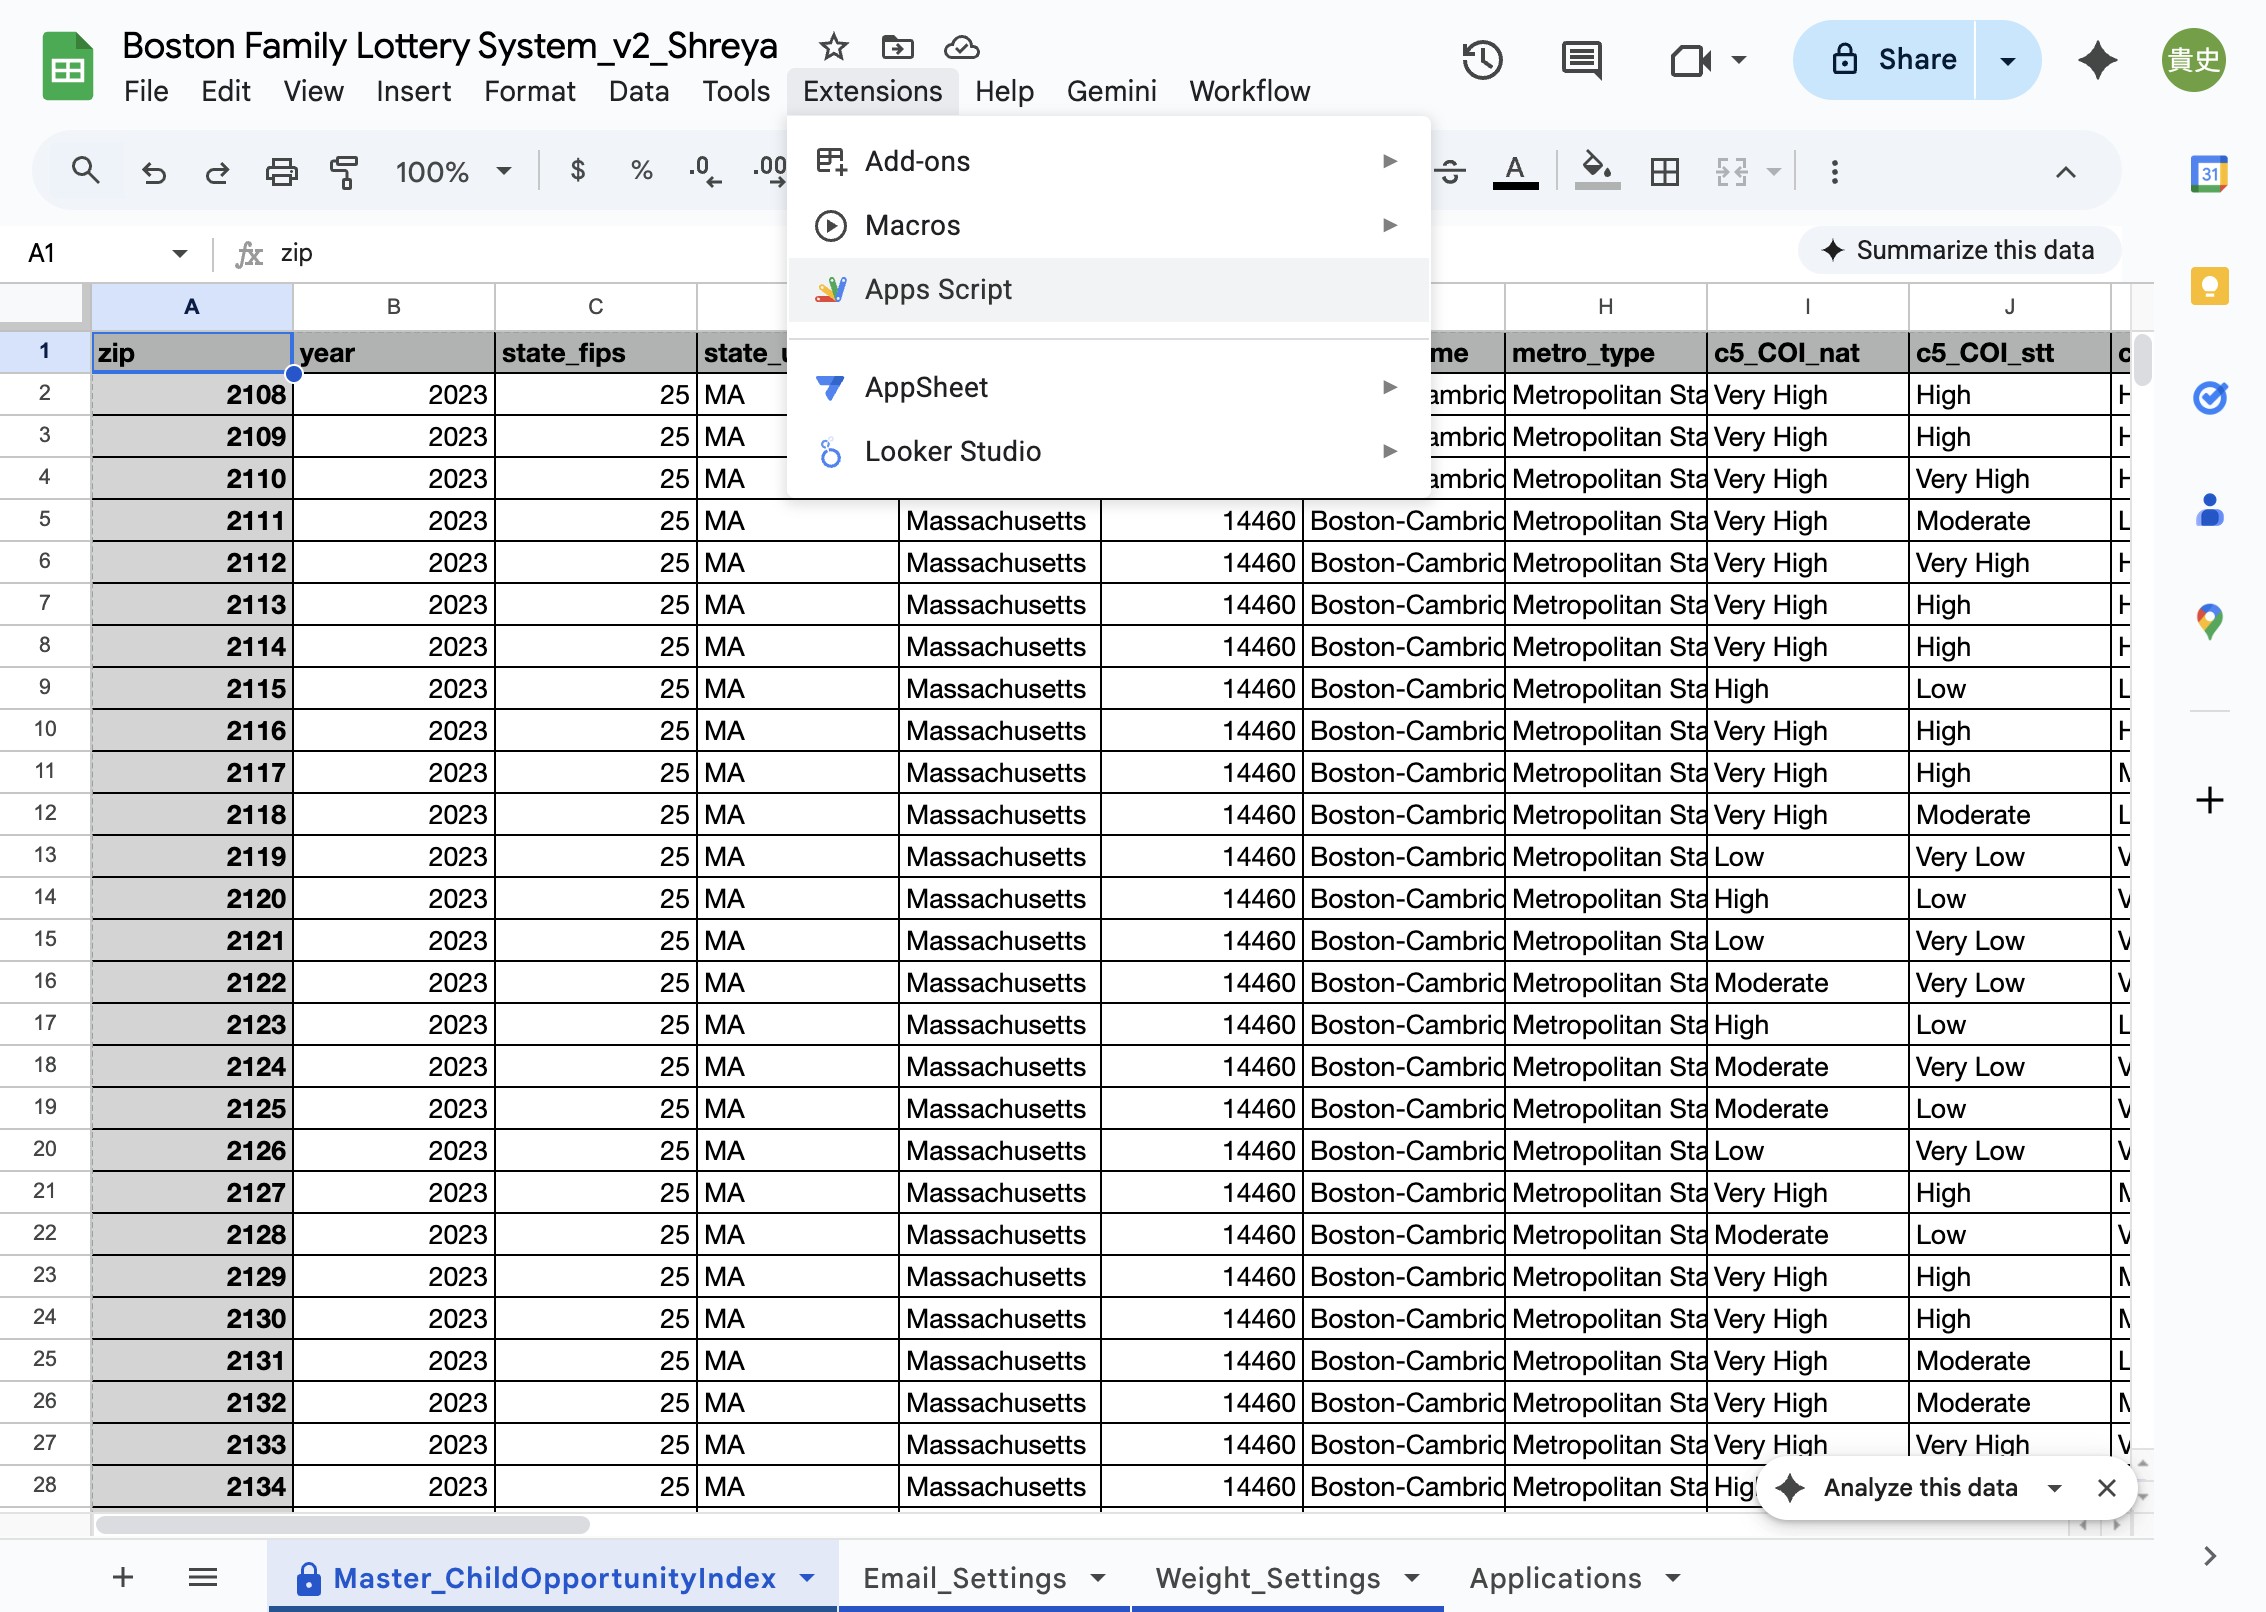
Step 2: Under Extensions on the Menu Bar, click 'App
Script'. A new browser tab will open with the Google Apps
Script editor. If you see a dialog asking for permissions,
click OK or Continue to proceed.
3
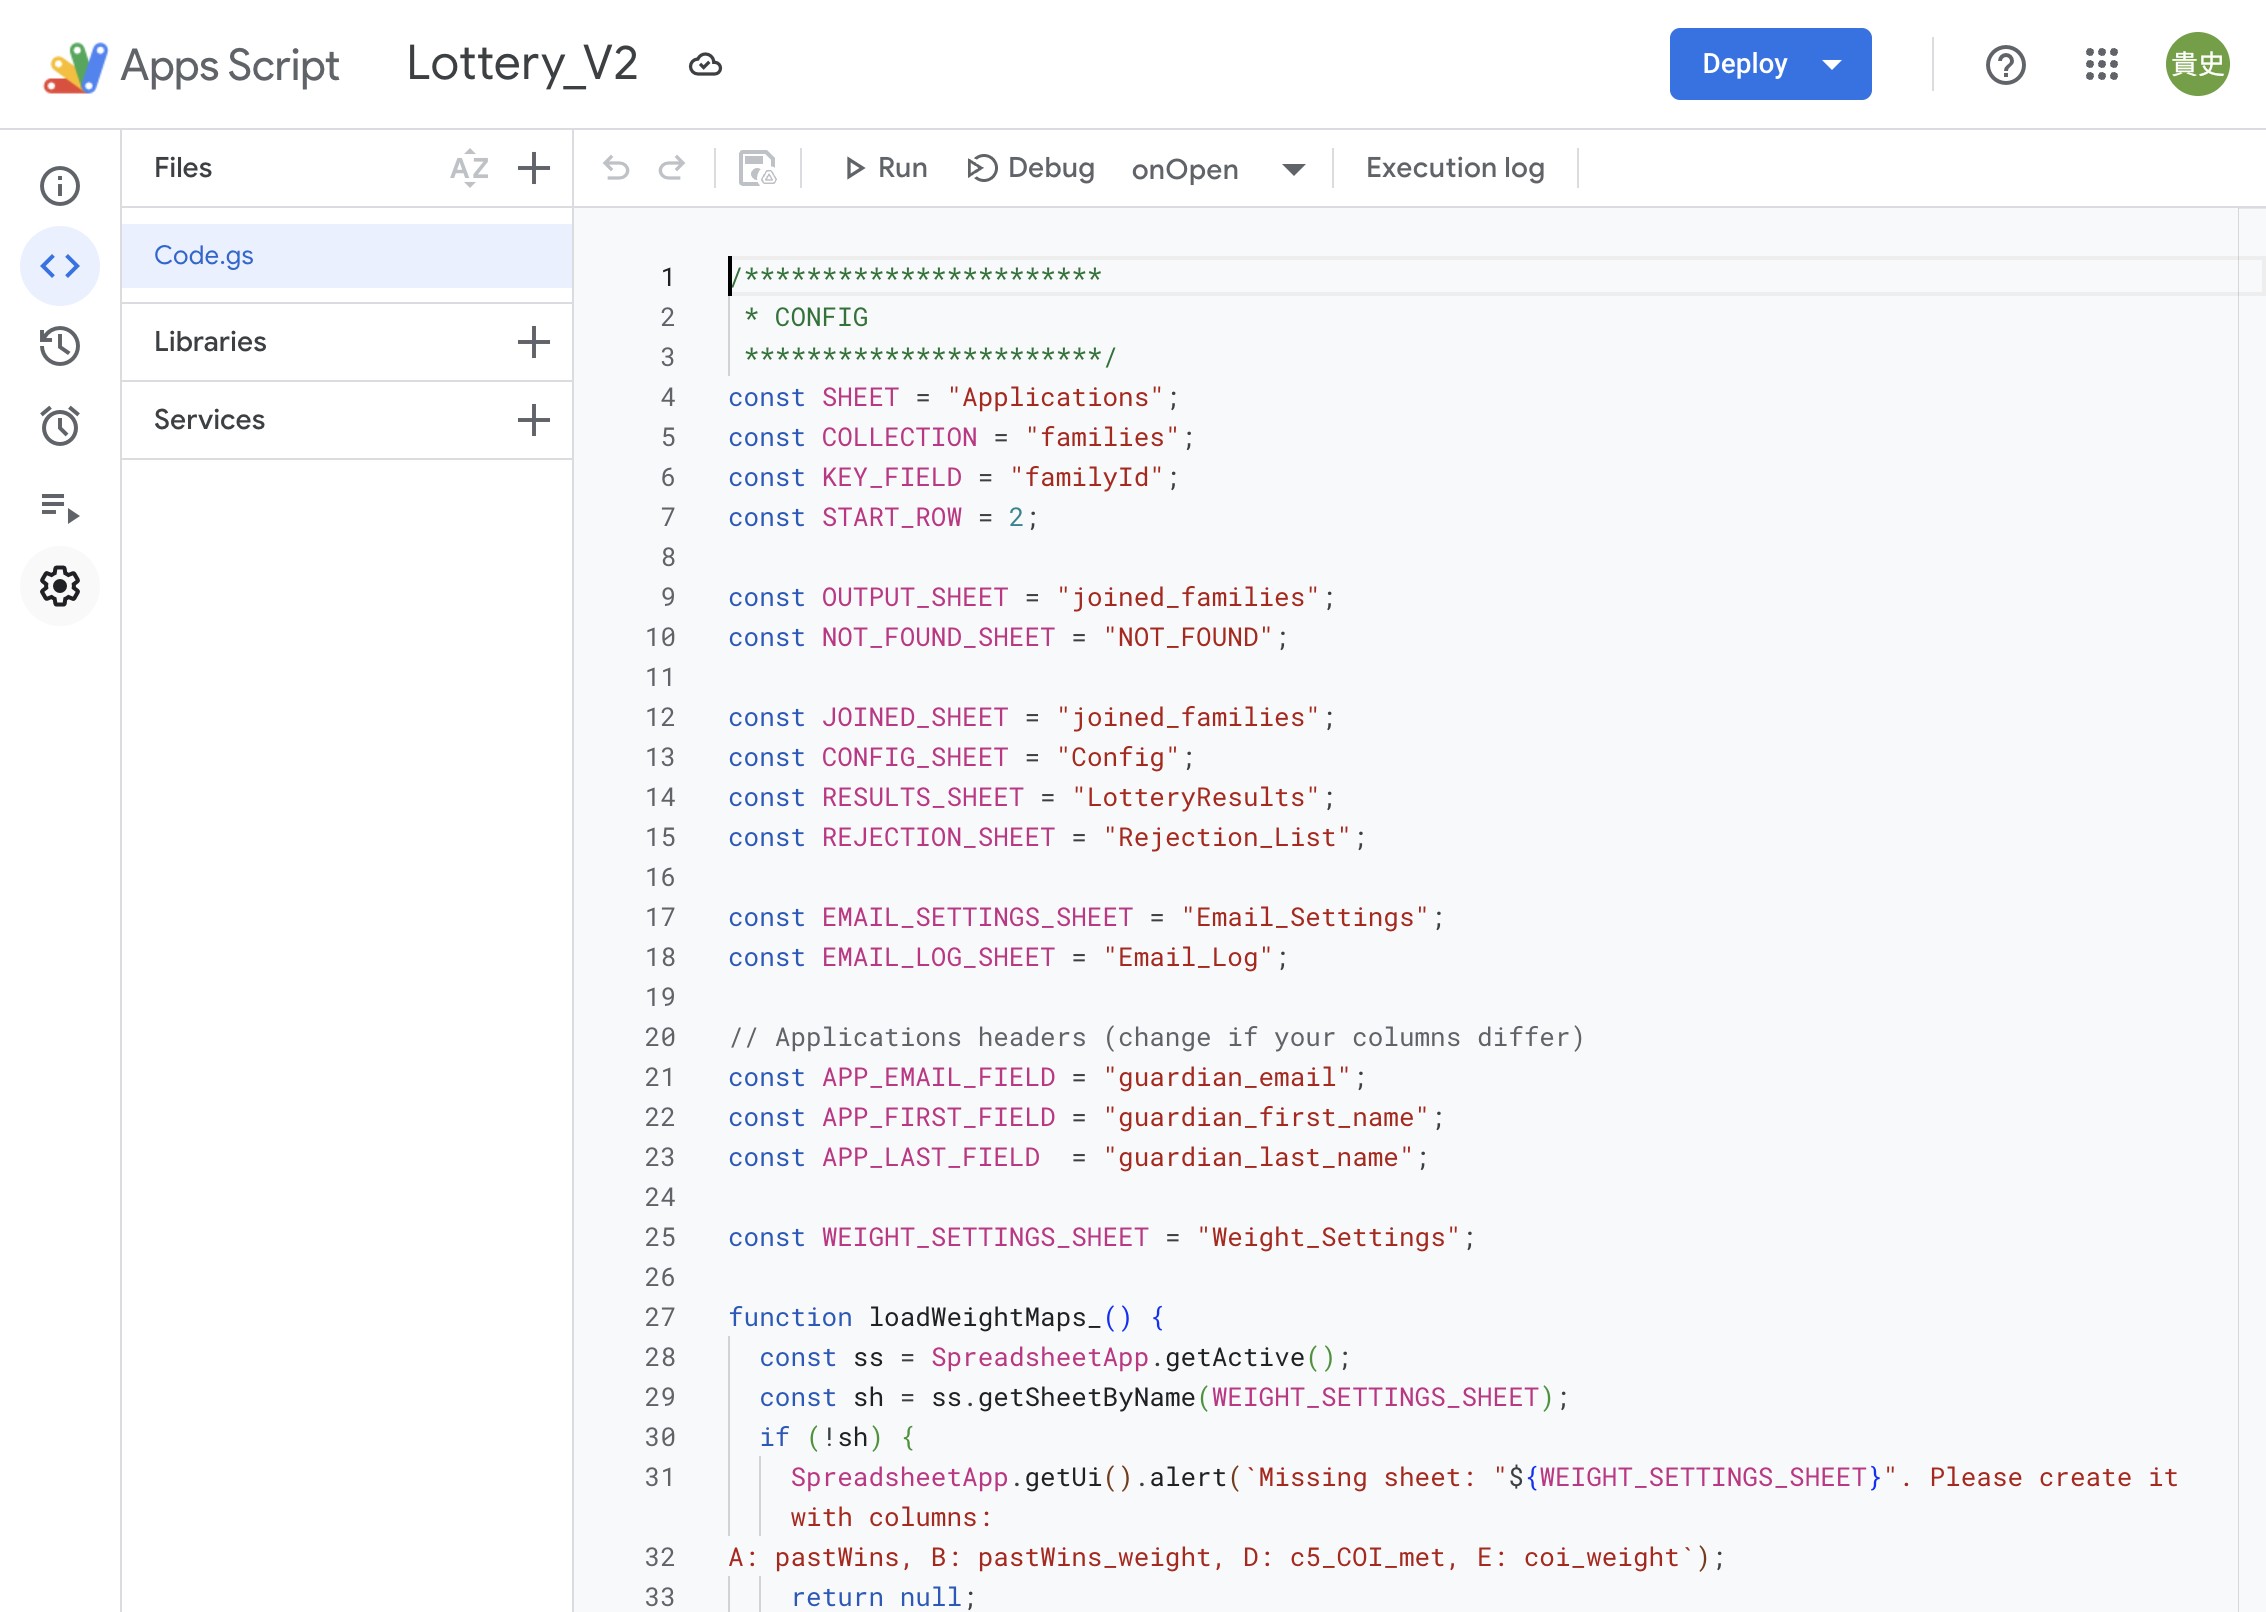
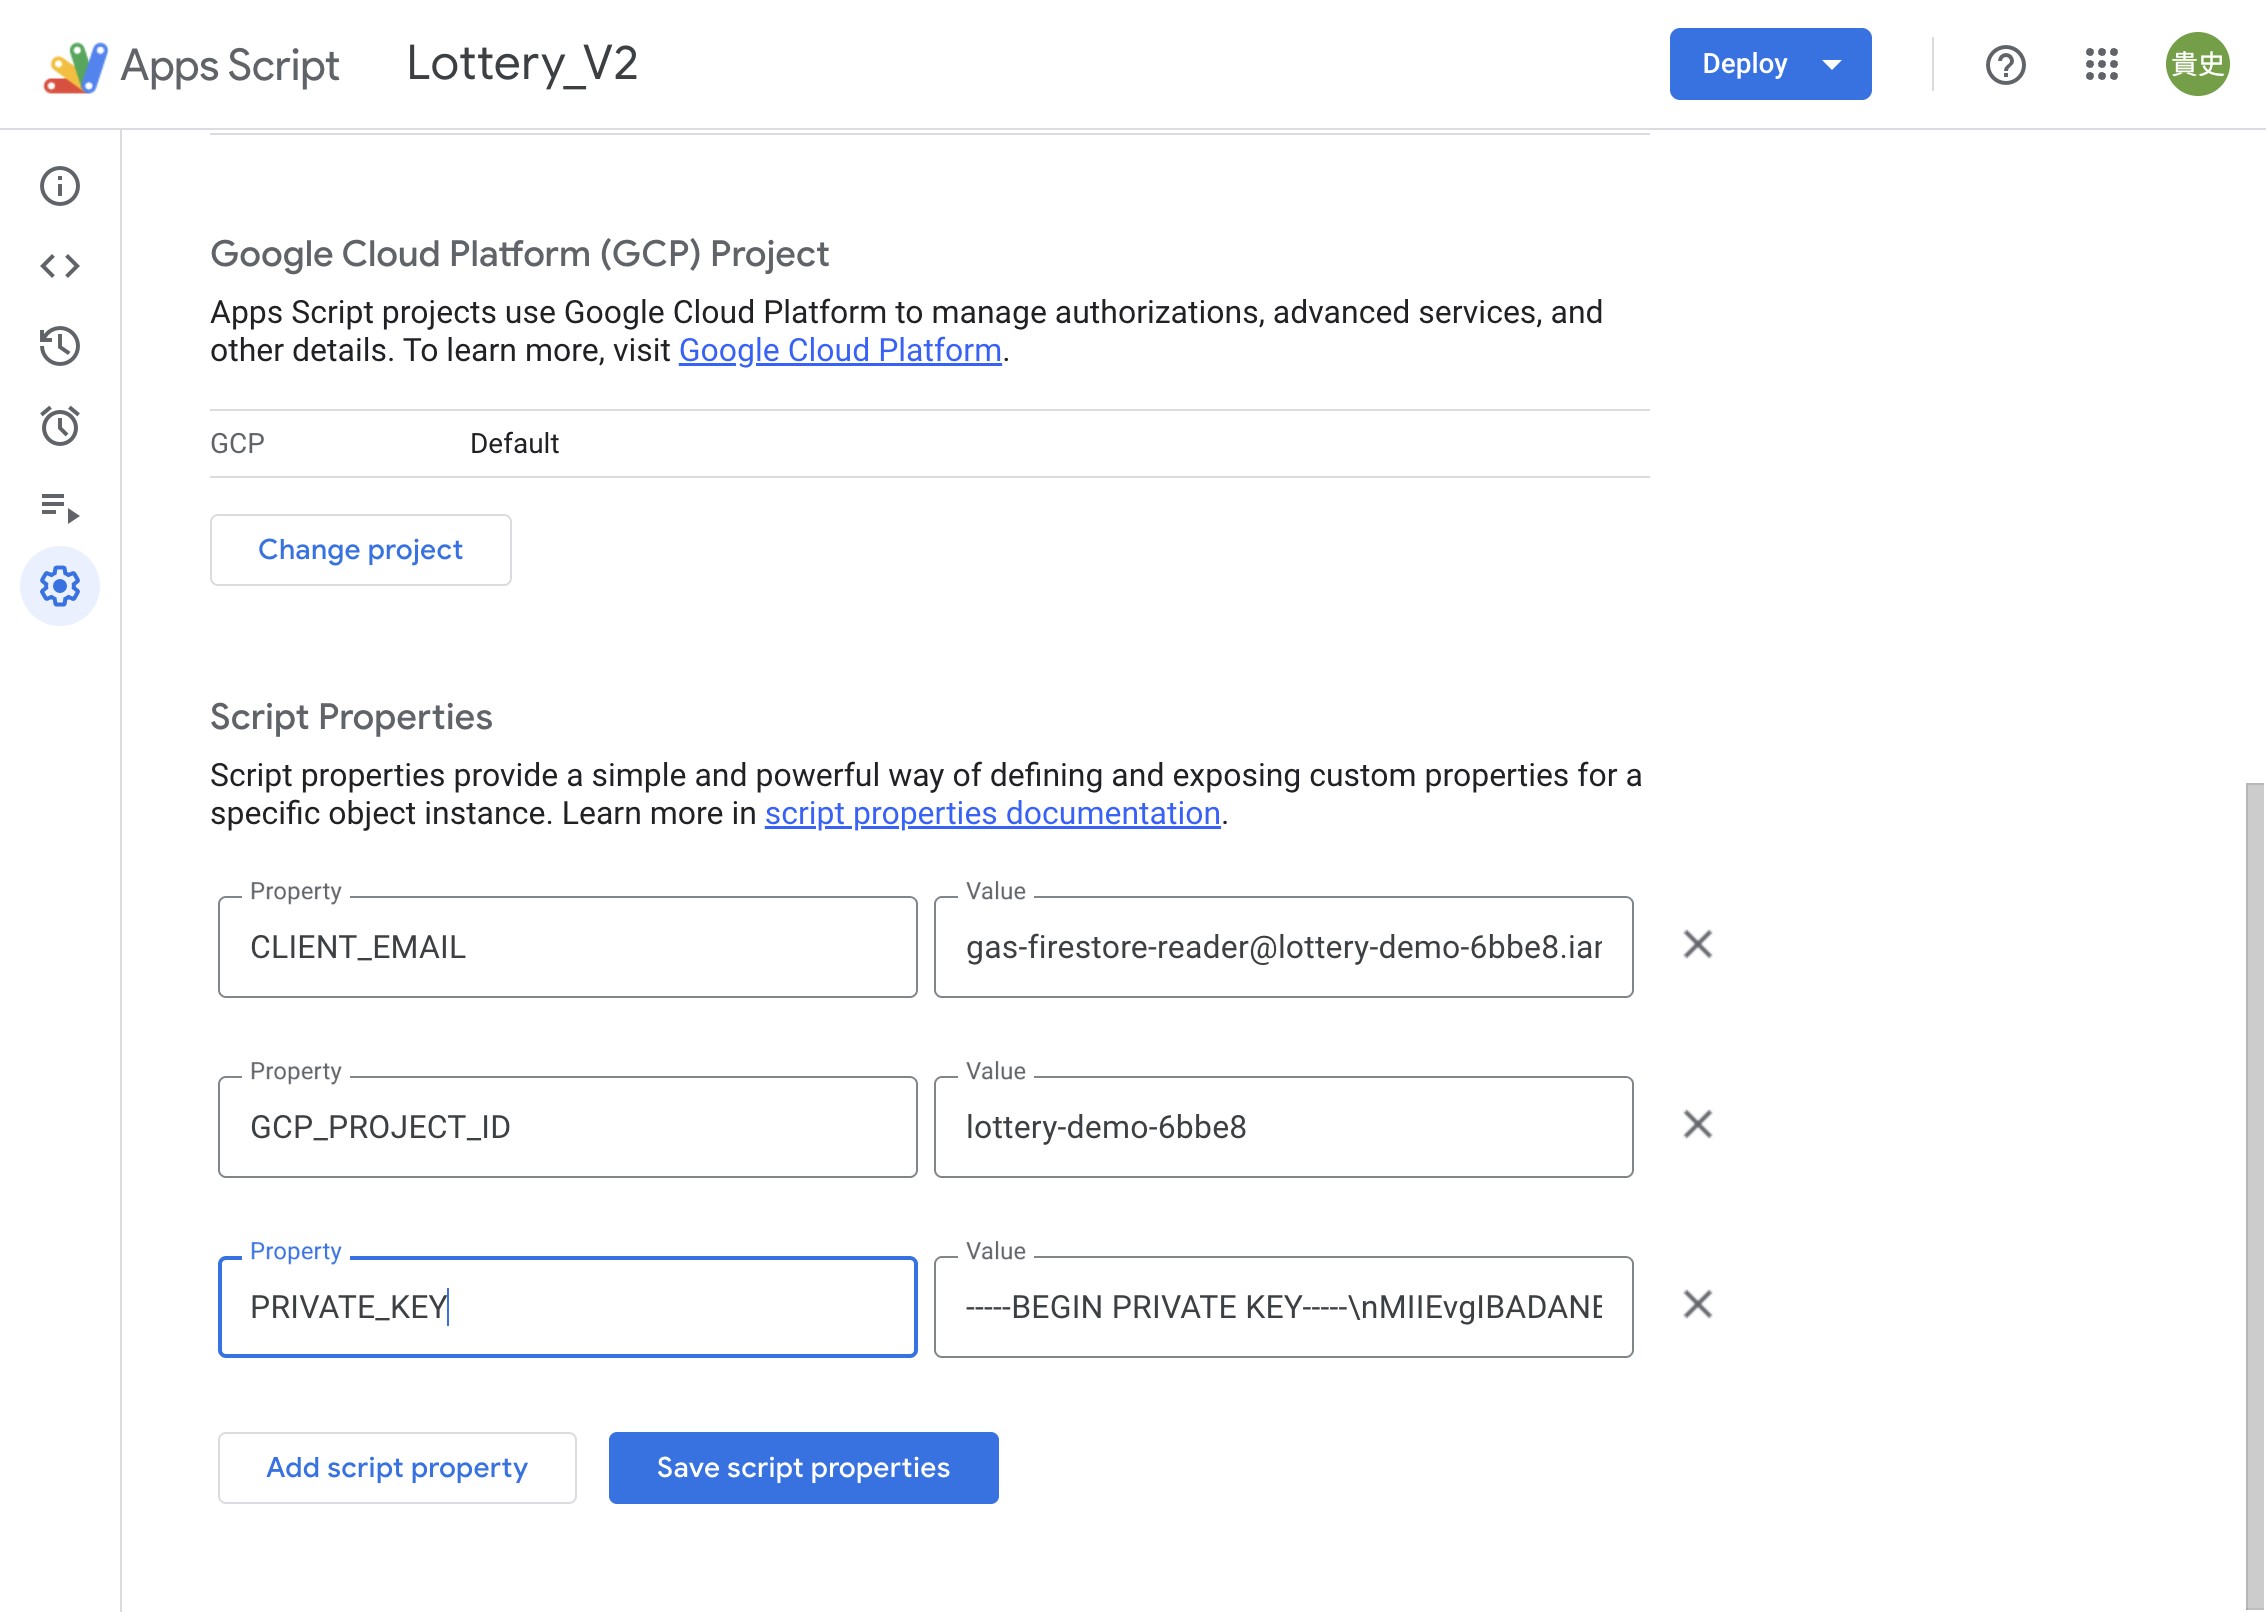
Step 3: Click on Settings (gear icon) in the left sidebar
to open the Project Settings page.
4
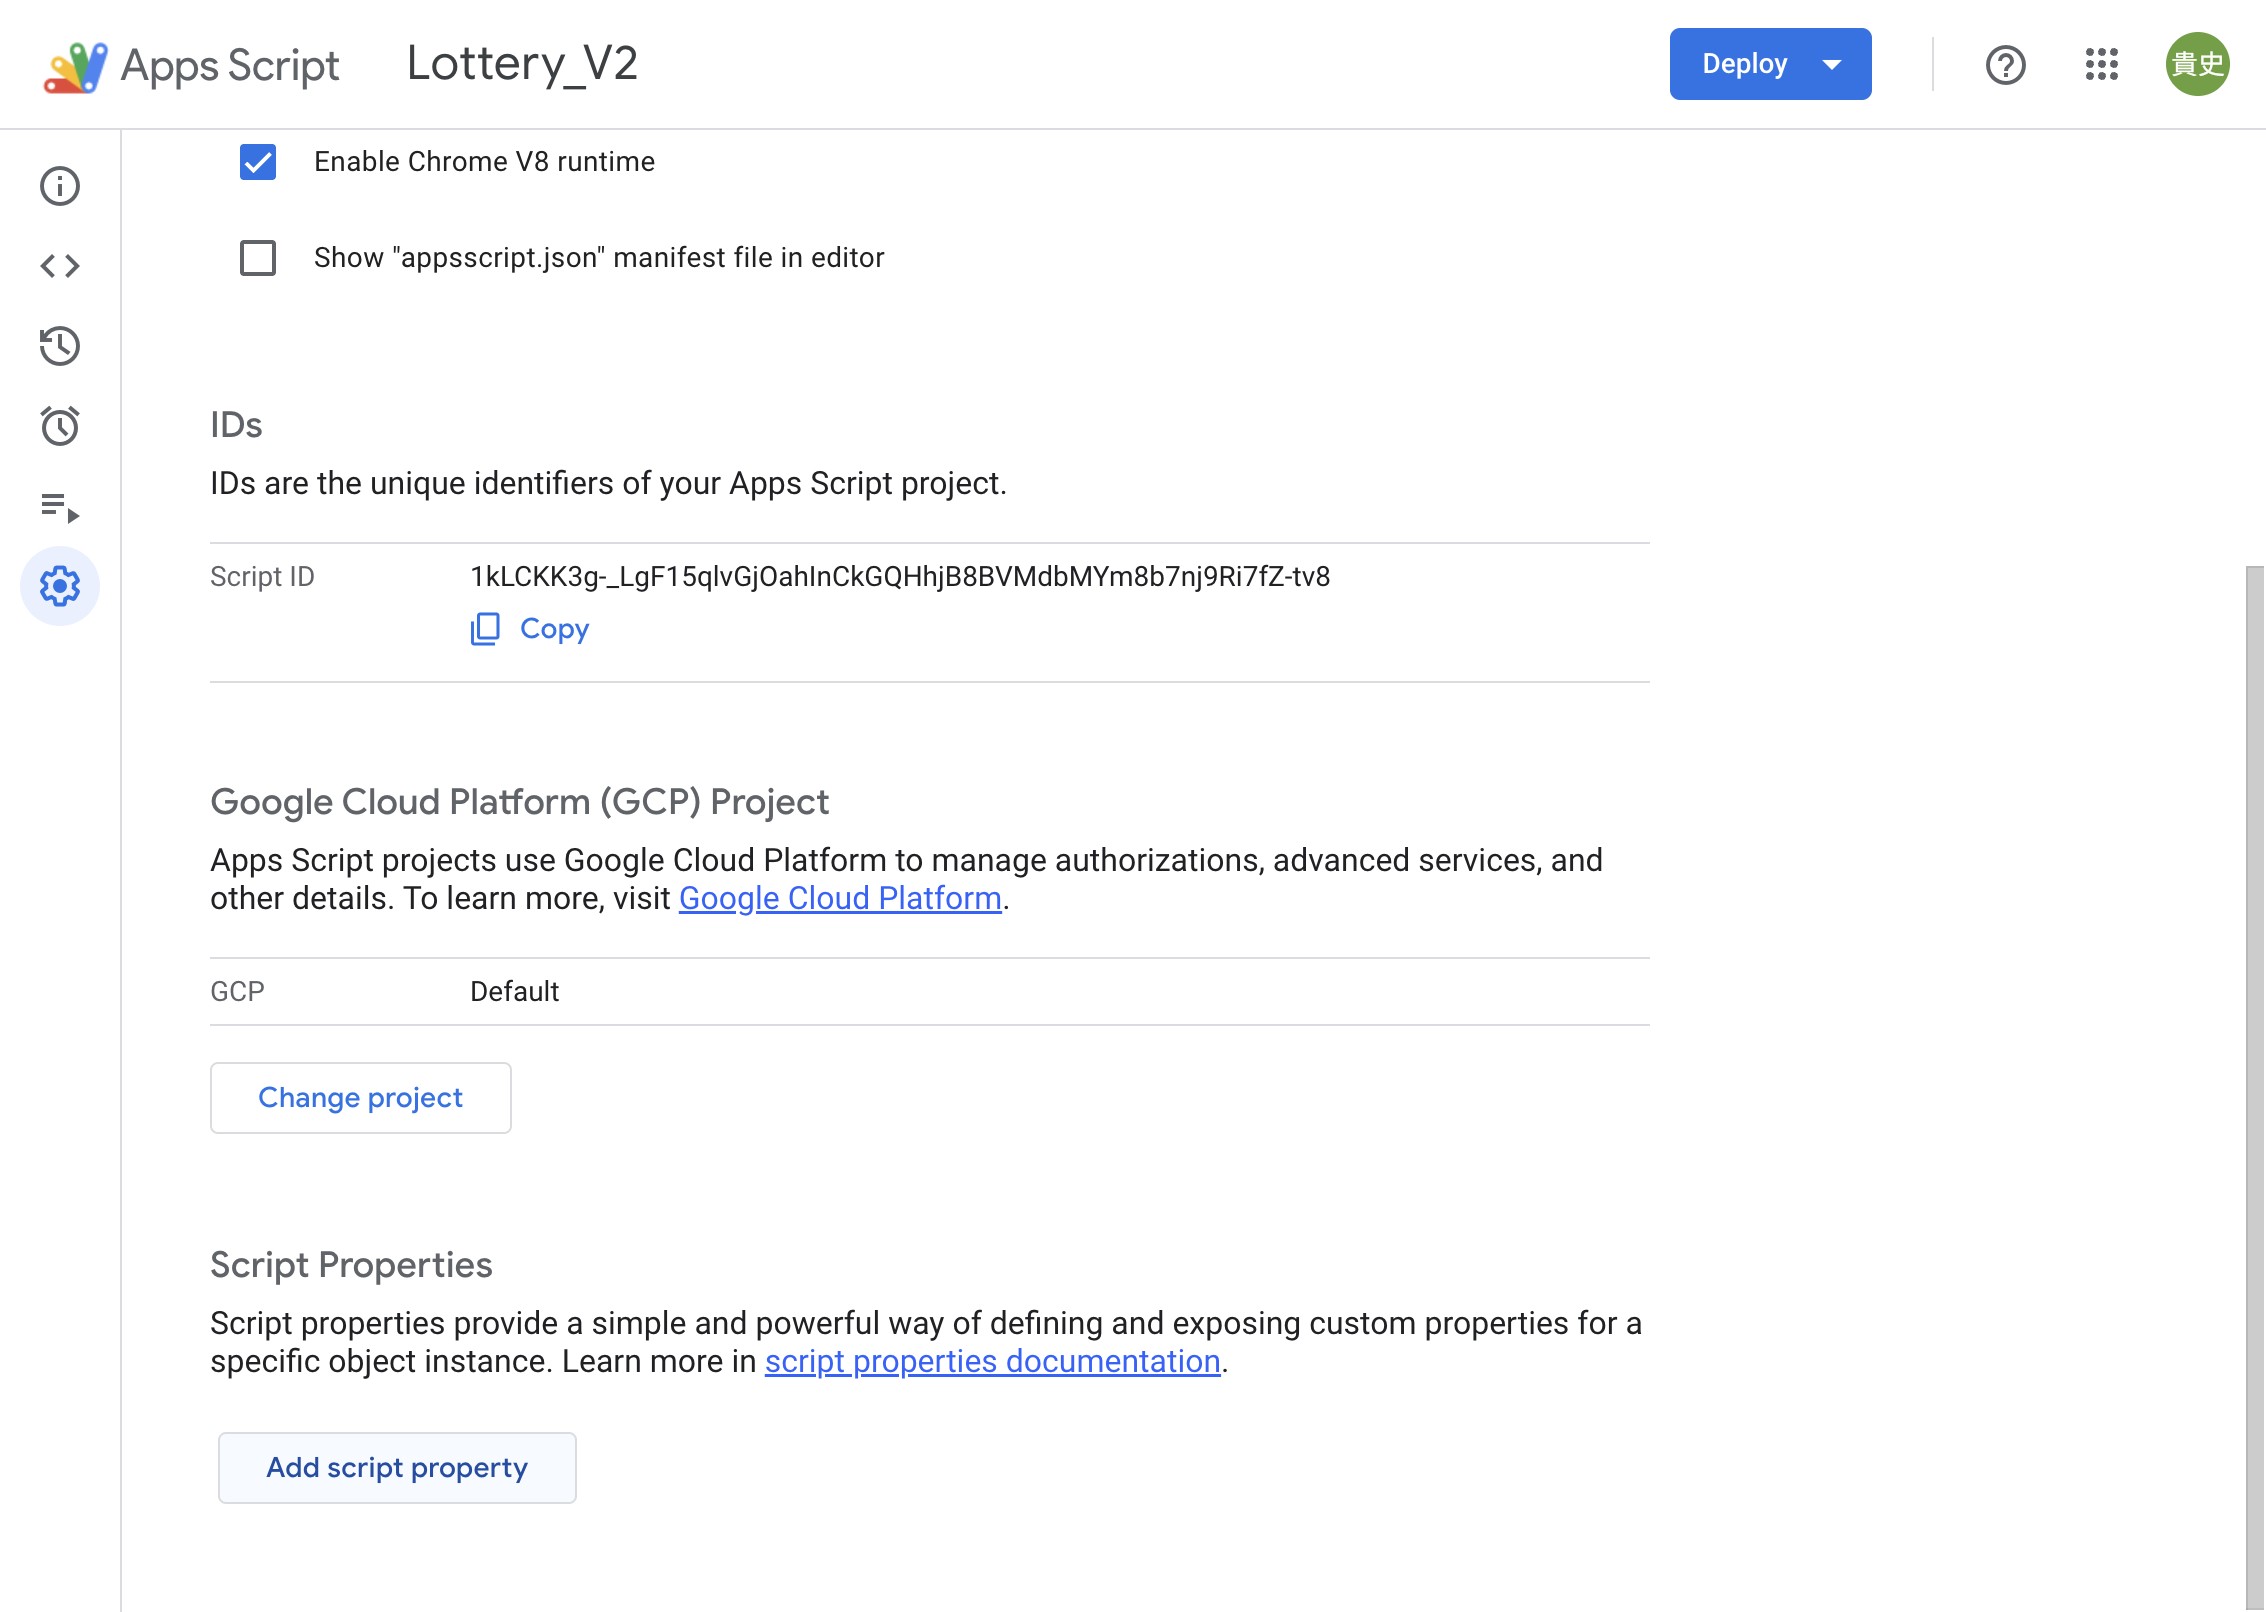
Step 4: Scroll down on the Project Settings page until
you see the Script properties section. Click the Add
script property button. You'll need to click this button 3
times to add all the required properties.
5
Step 5: Fill in the Property and Value text boxes with
information from Firebase and Google Console and click
'Save script properties' button.
Running the Lottery System on Google Apps Script
1
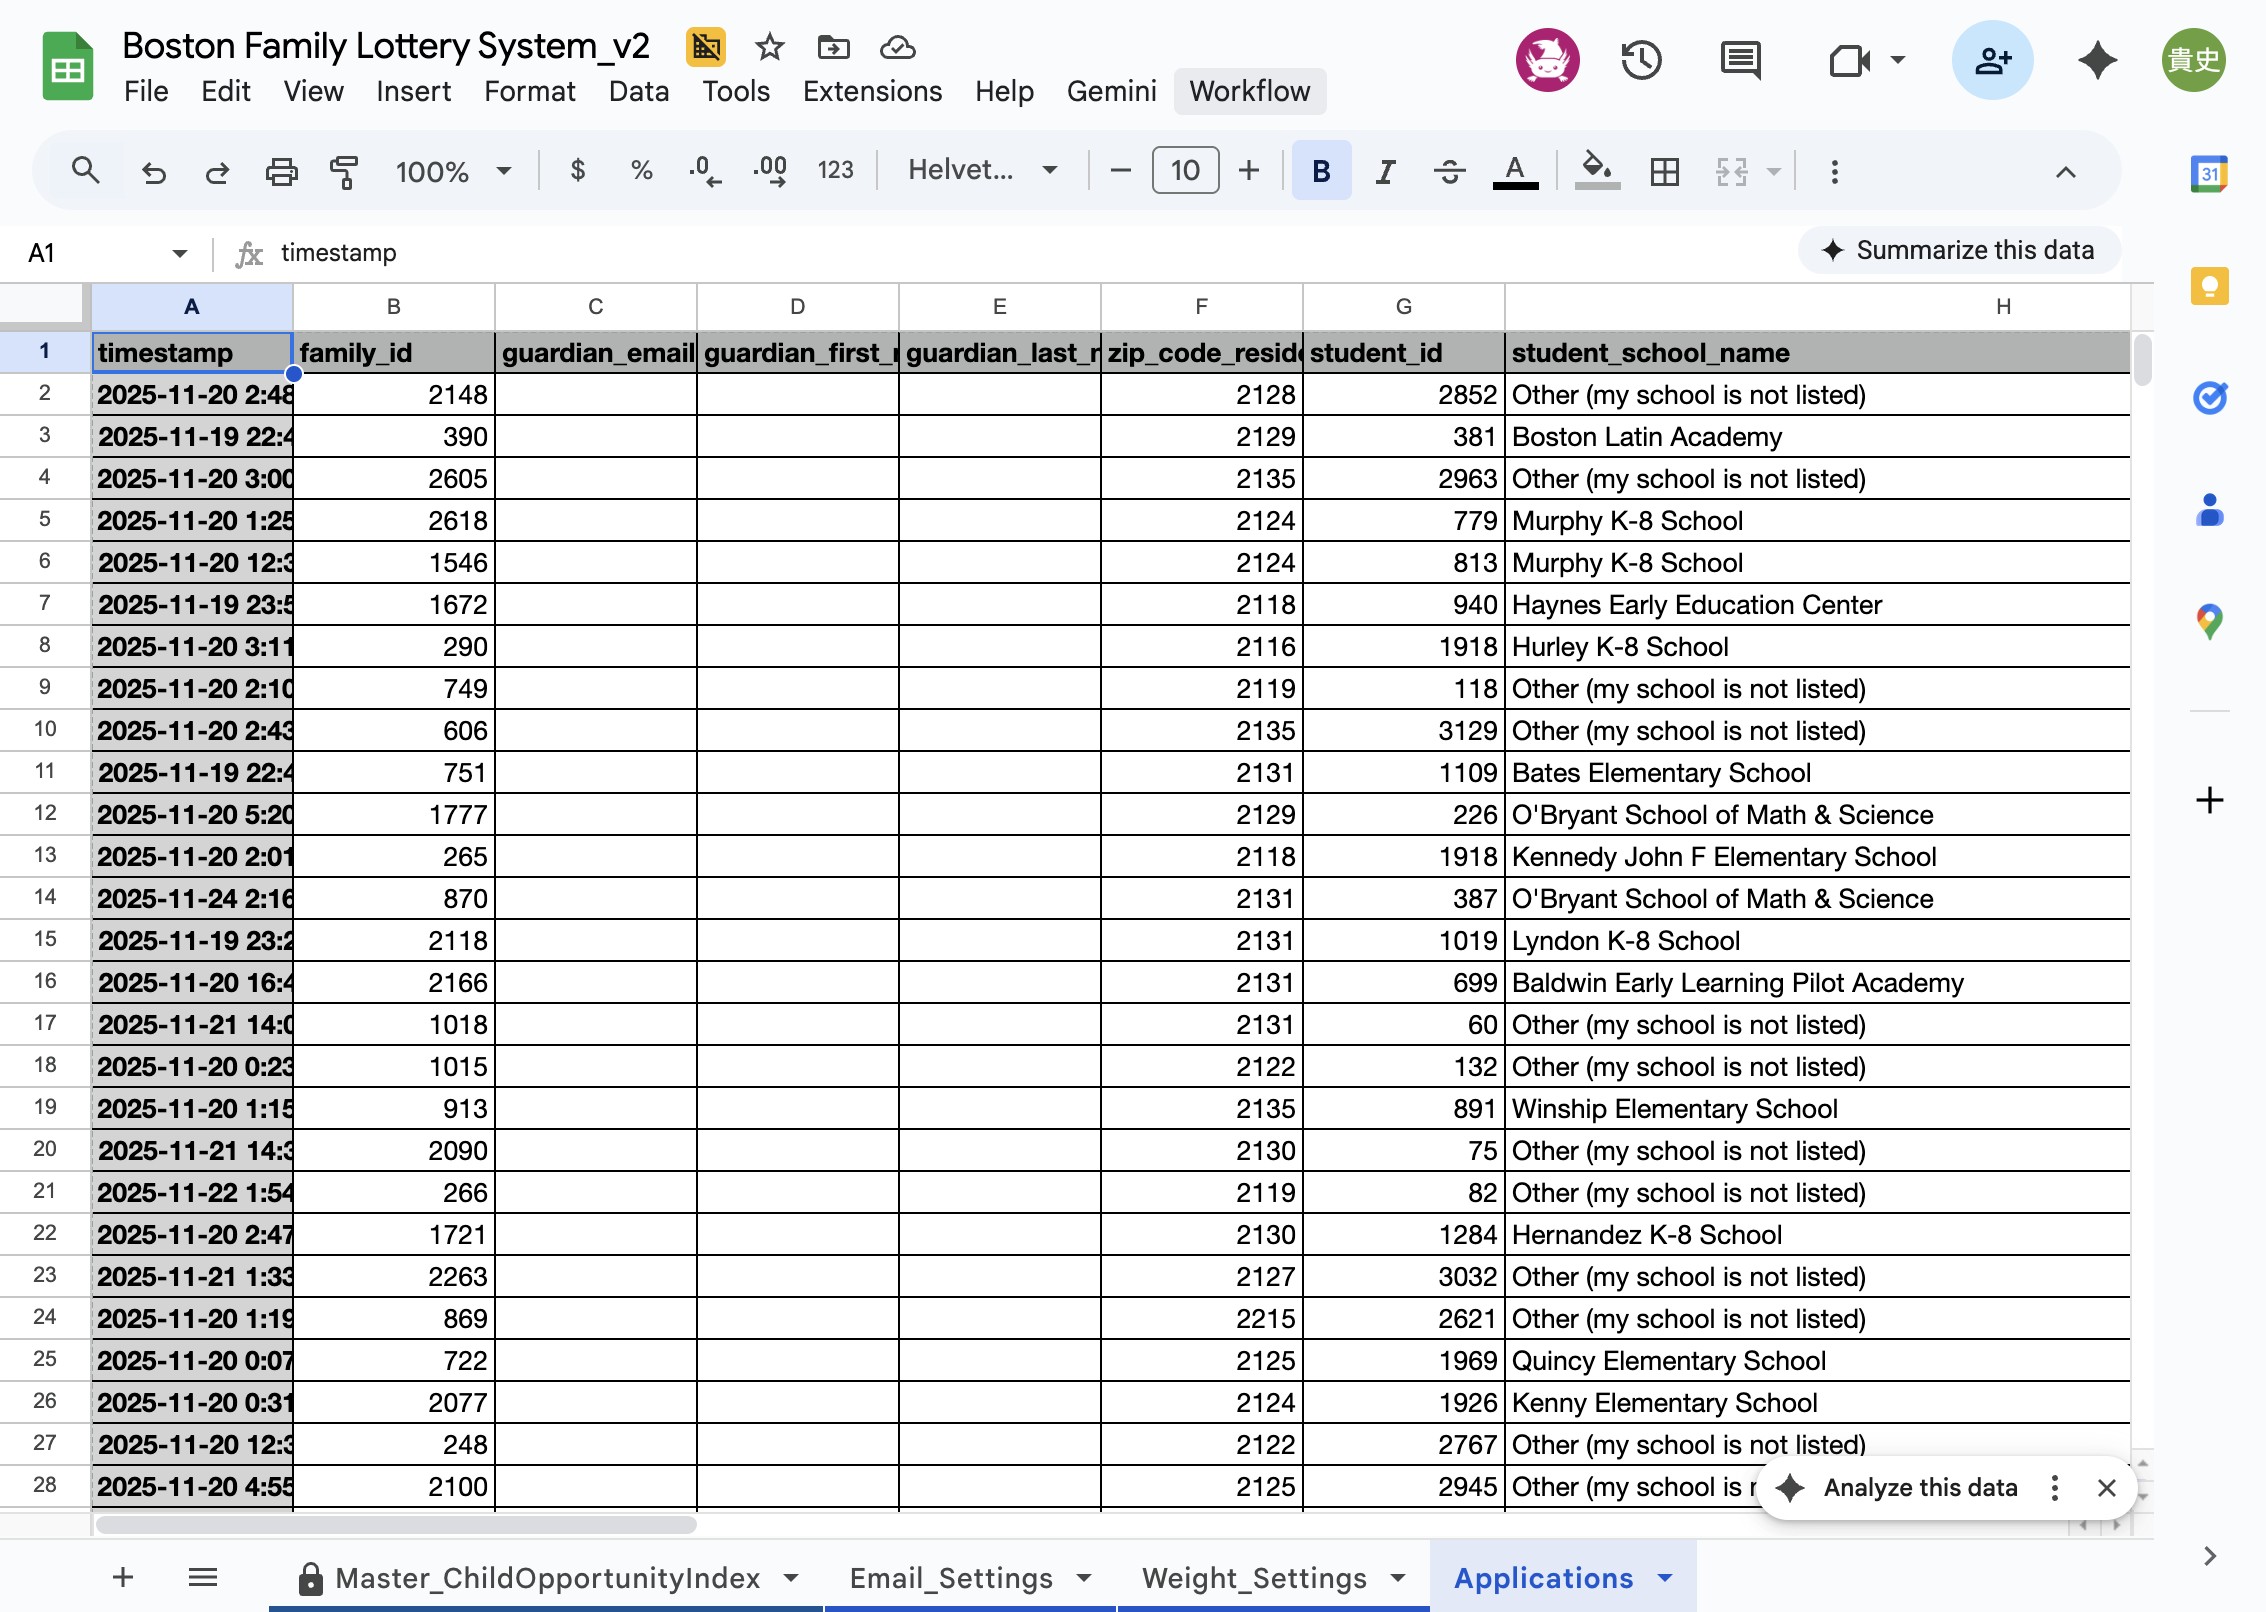
Step 1: Paste the Submittable CSV into Google Sheets
under the "Applications" sheet.
*For the demonstration/testing, we copied the data from the datasheet shared with us in the external channel.*
*For the demonstration/testing, we copied the data from the datasheet shared with us in the external channel.*
2
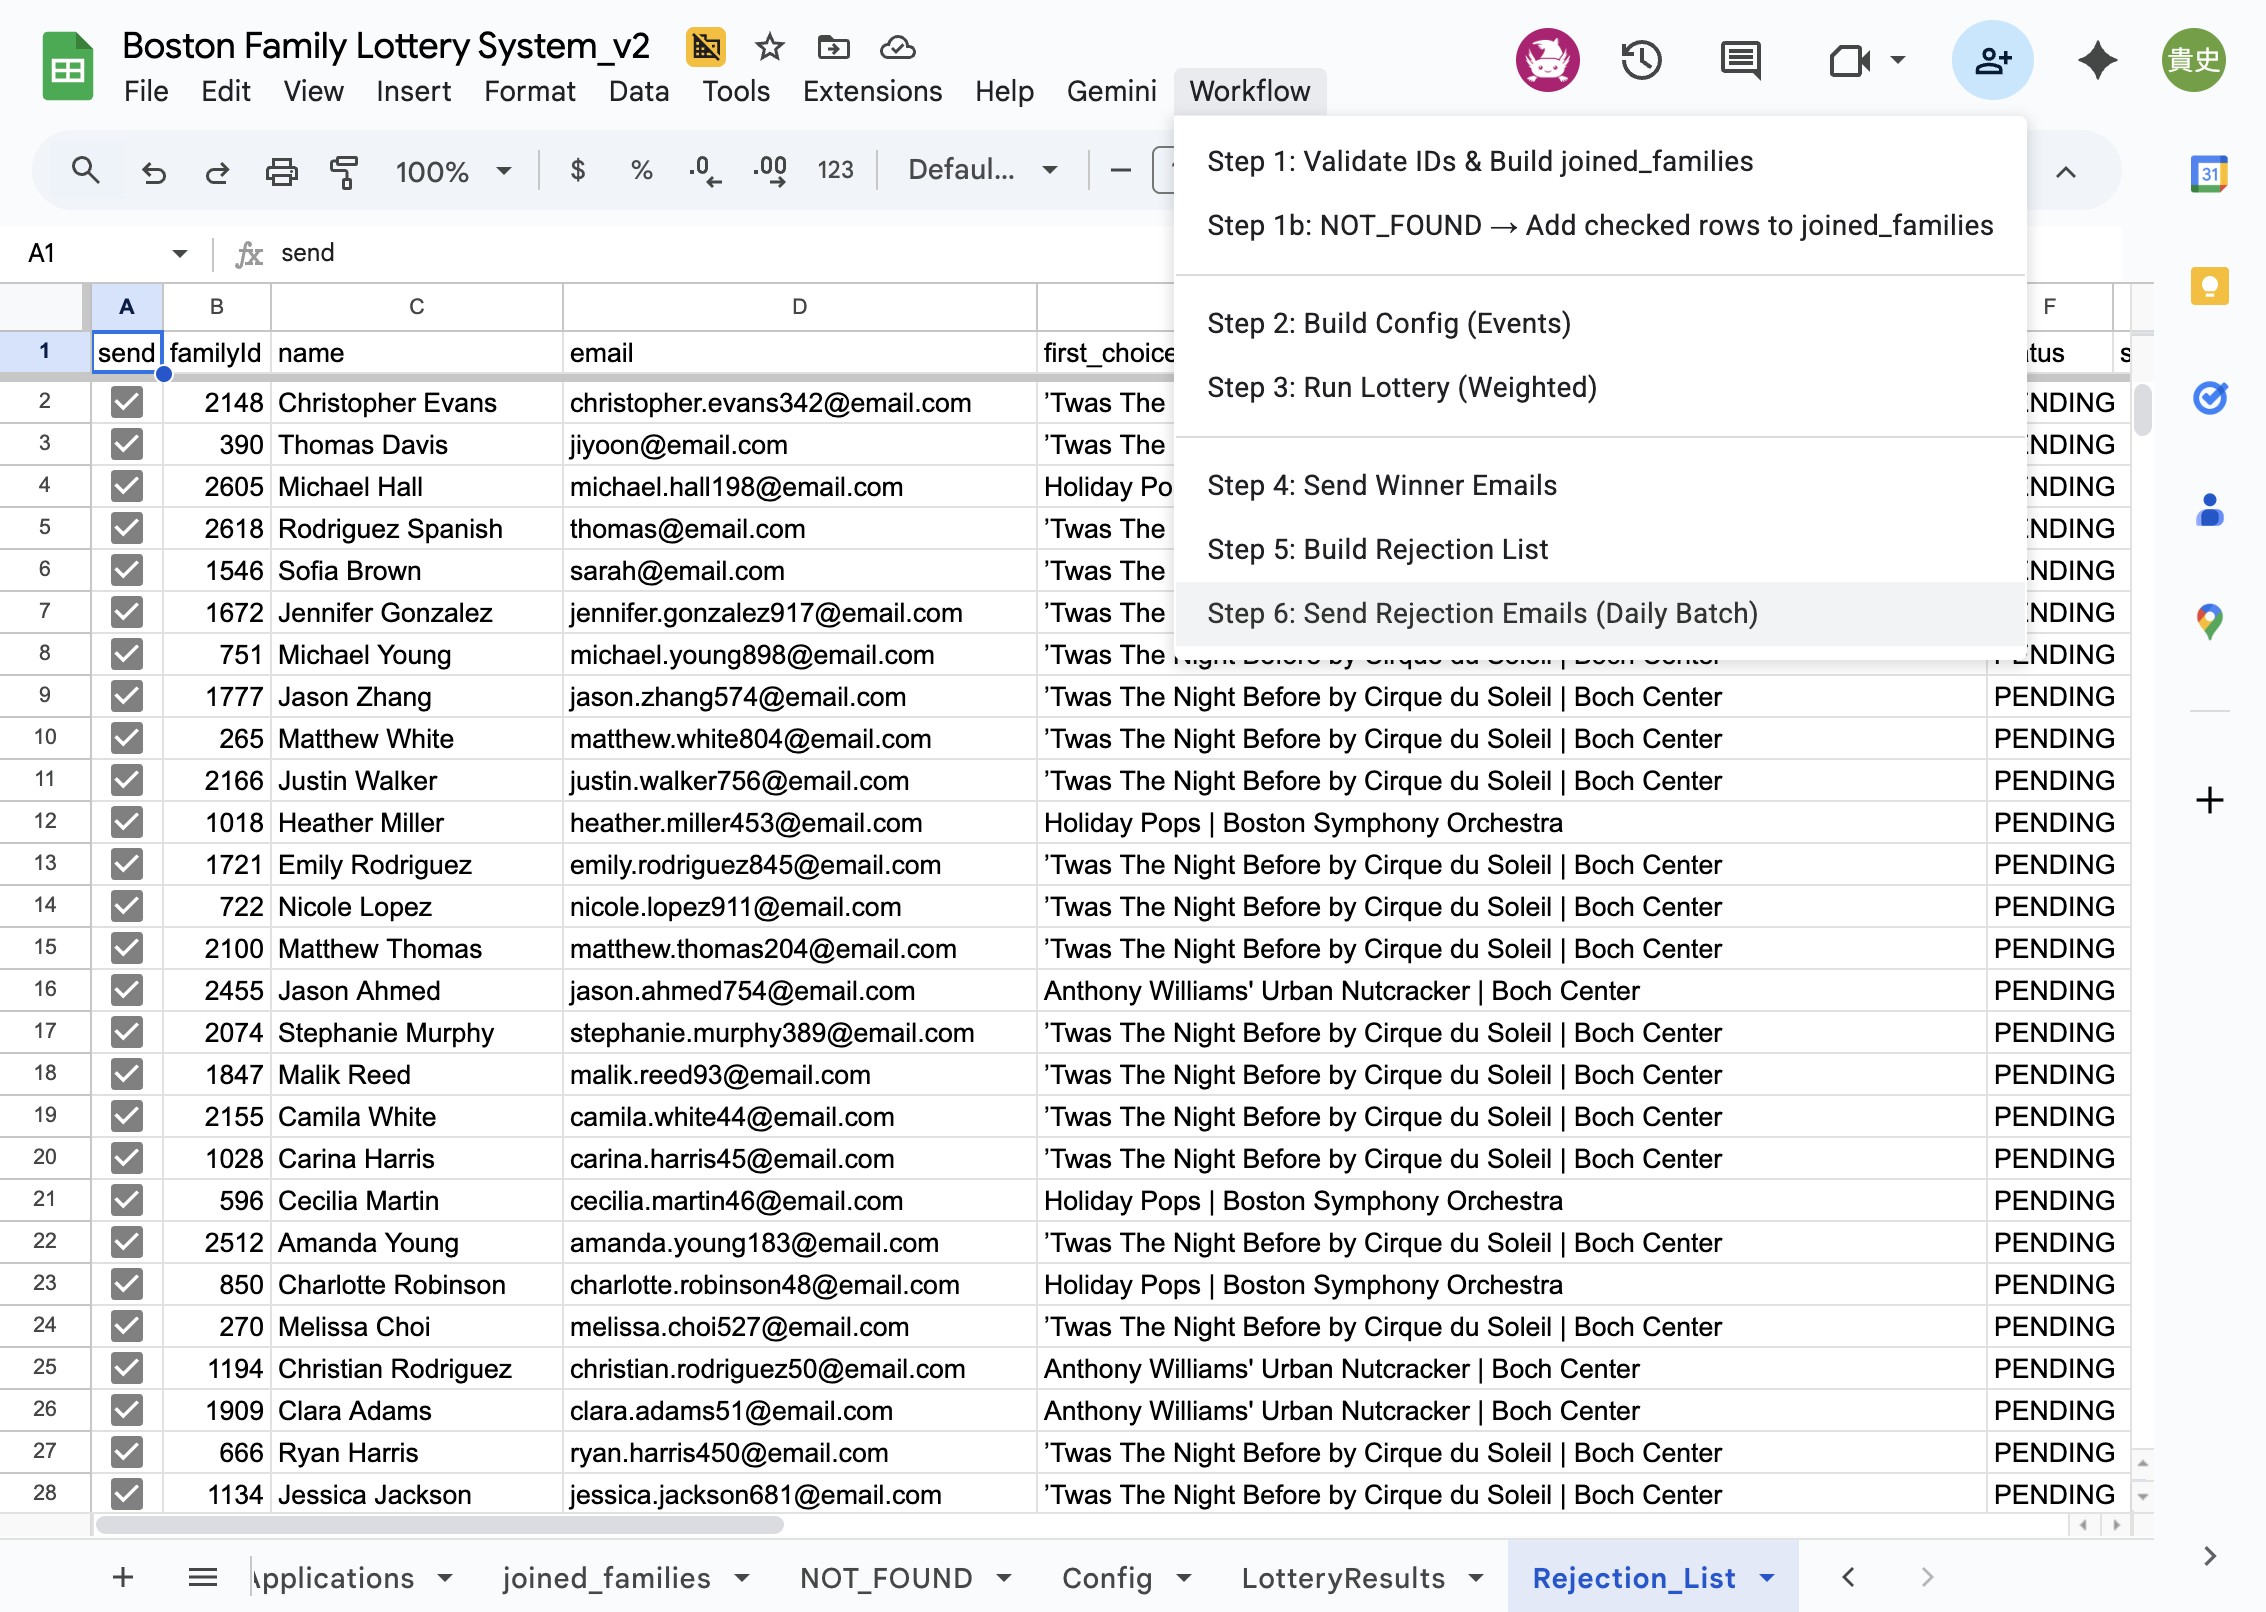
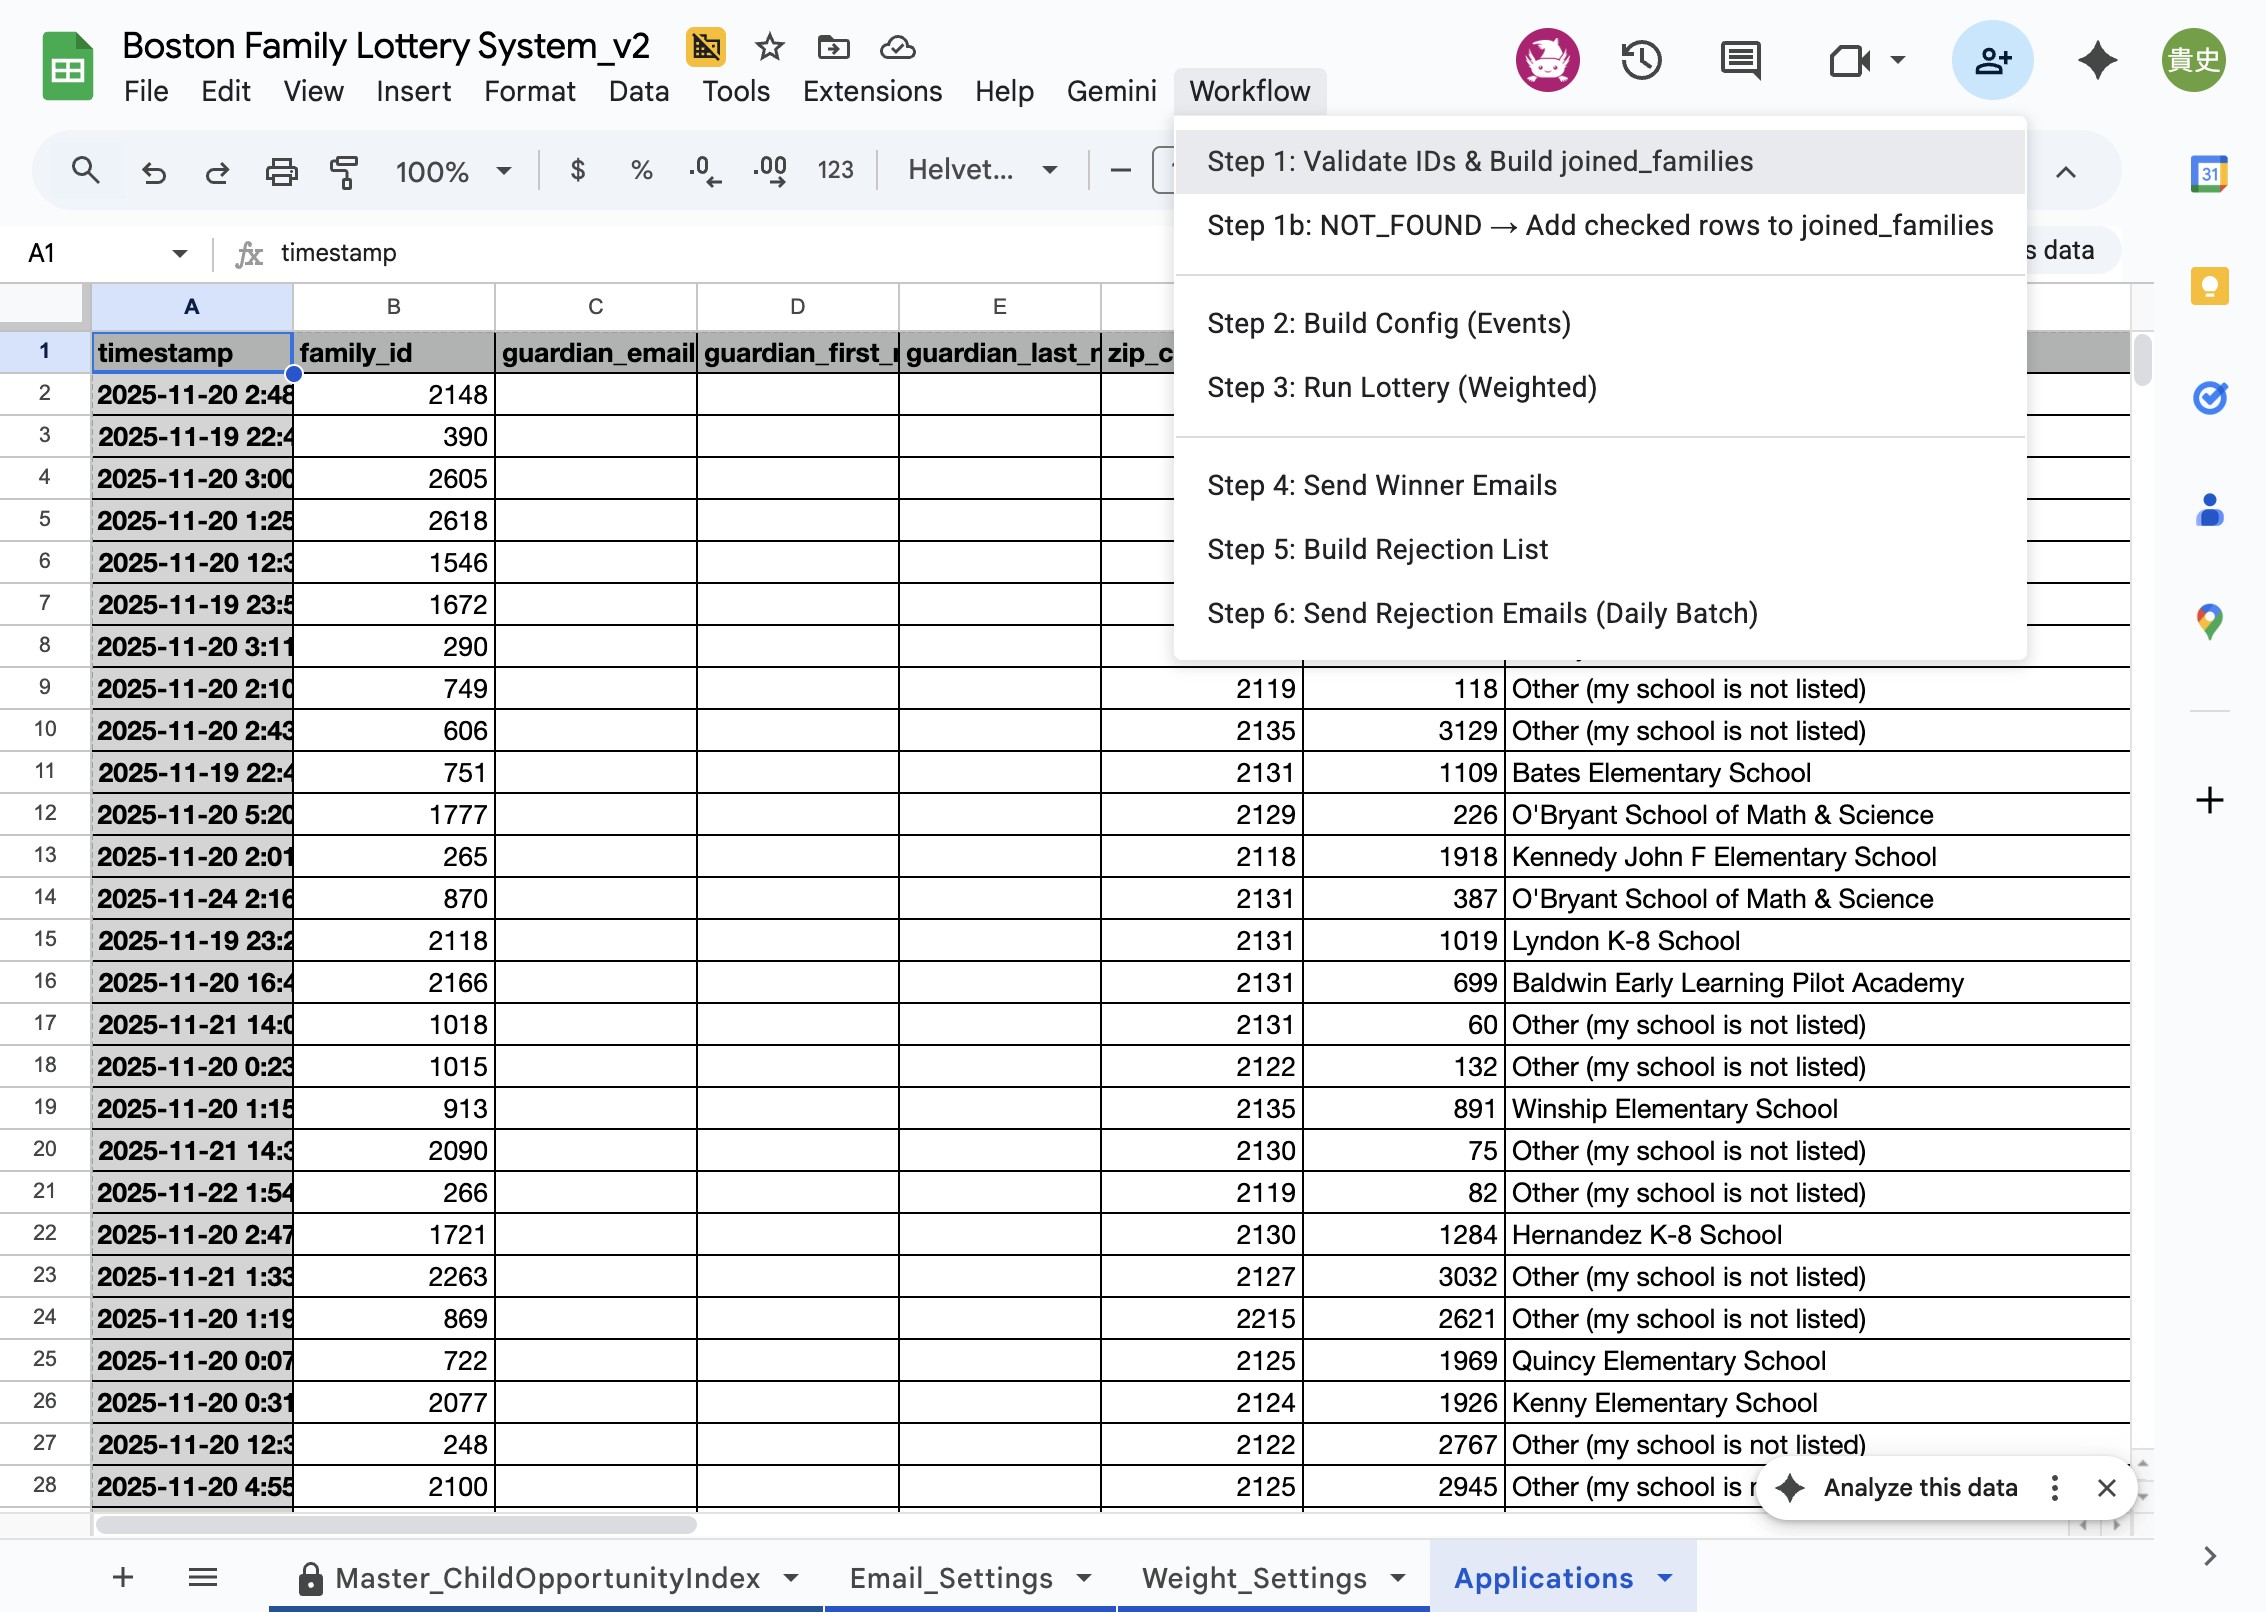
Step 2: Go to the Workflow menu (in the top menu bar) and
select 'Step 1: Validate IDs & Build joined_families'. The
script will create a new sheet called joined_families with
families that have validated IDs, and a NOT_FOUND sheet
with invalid or unmatched Family IDs.
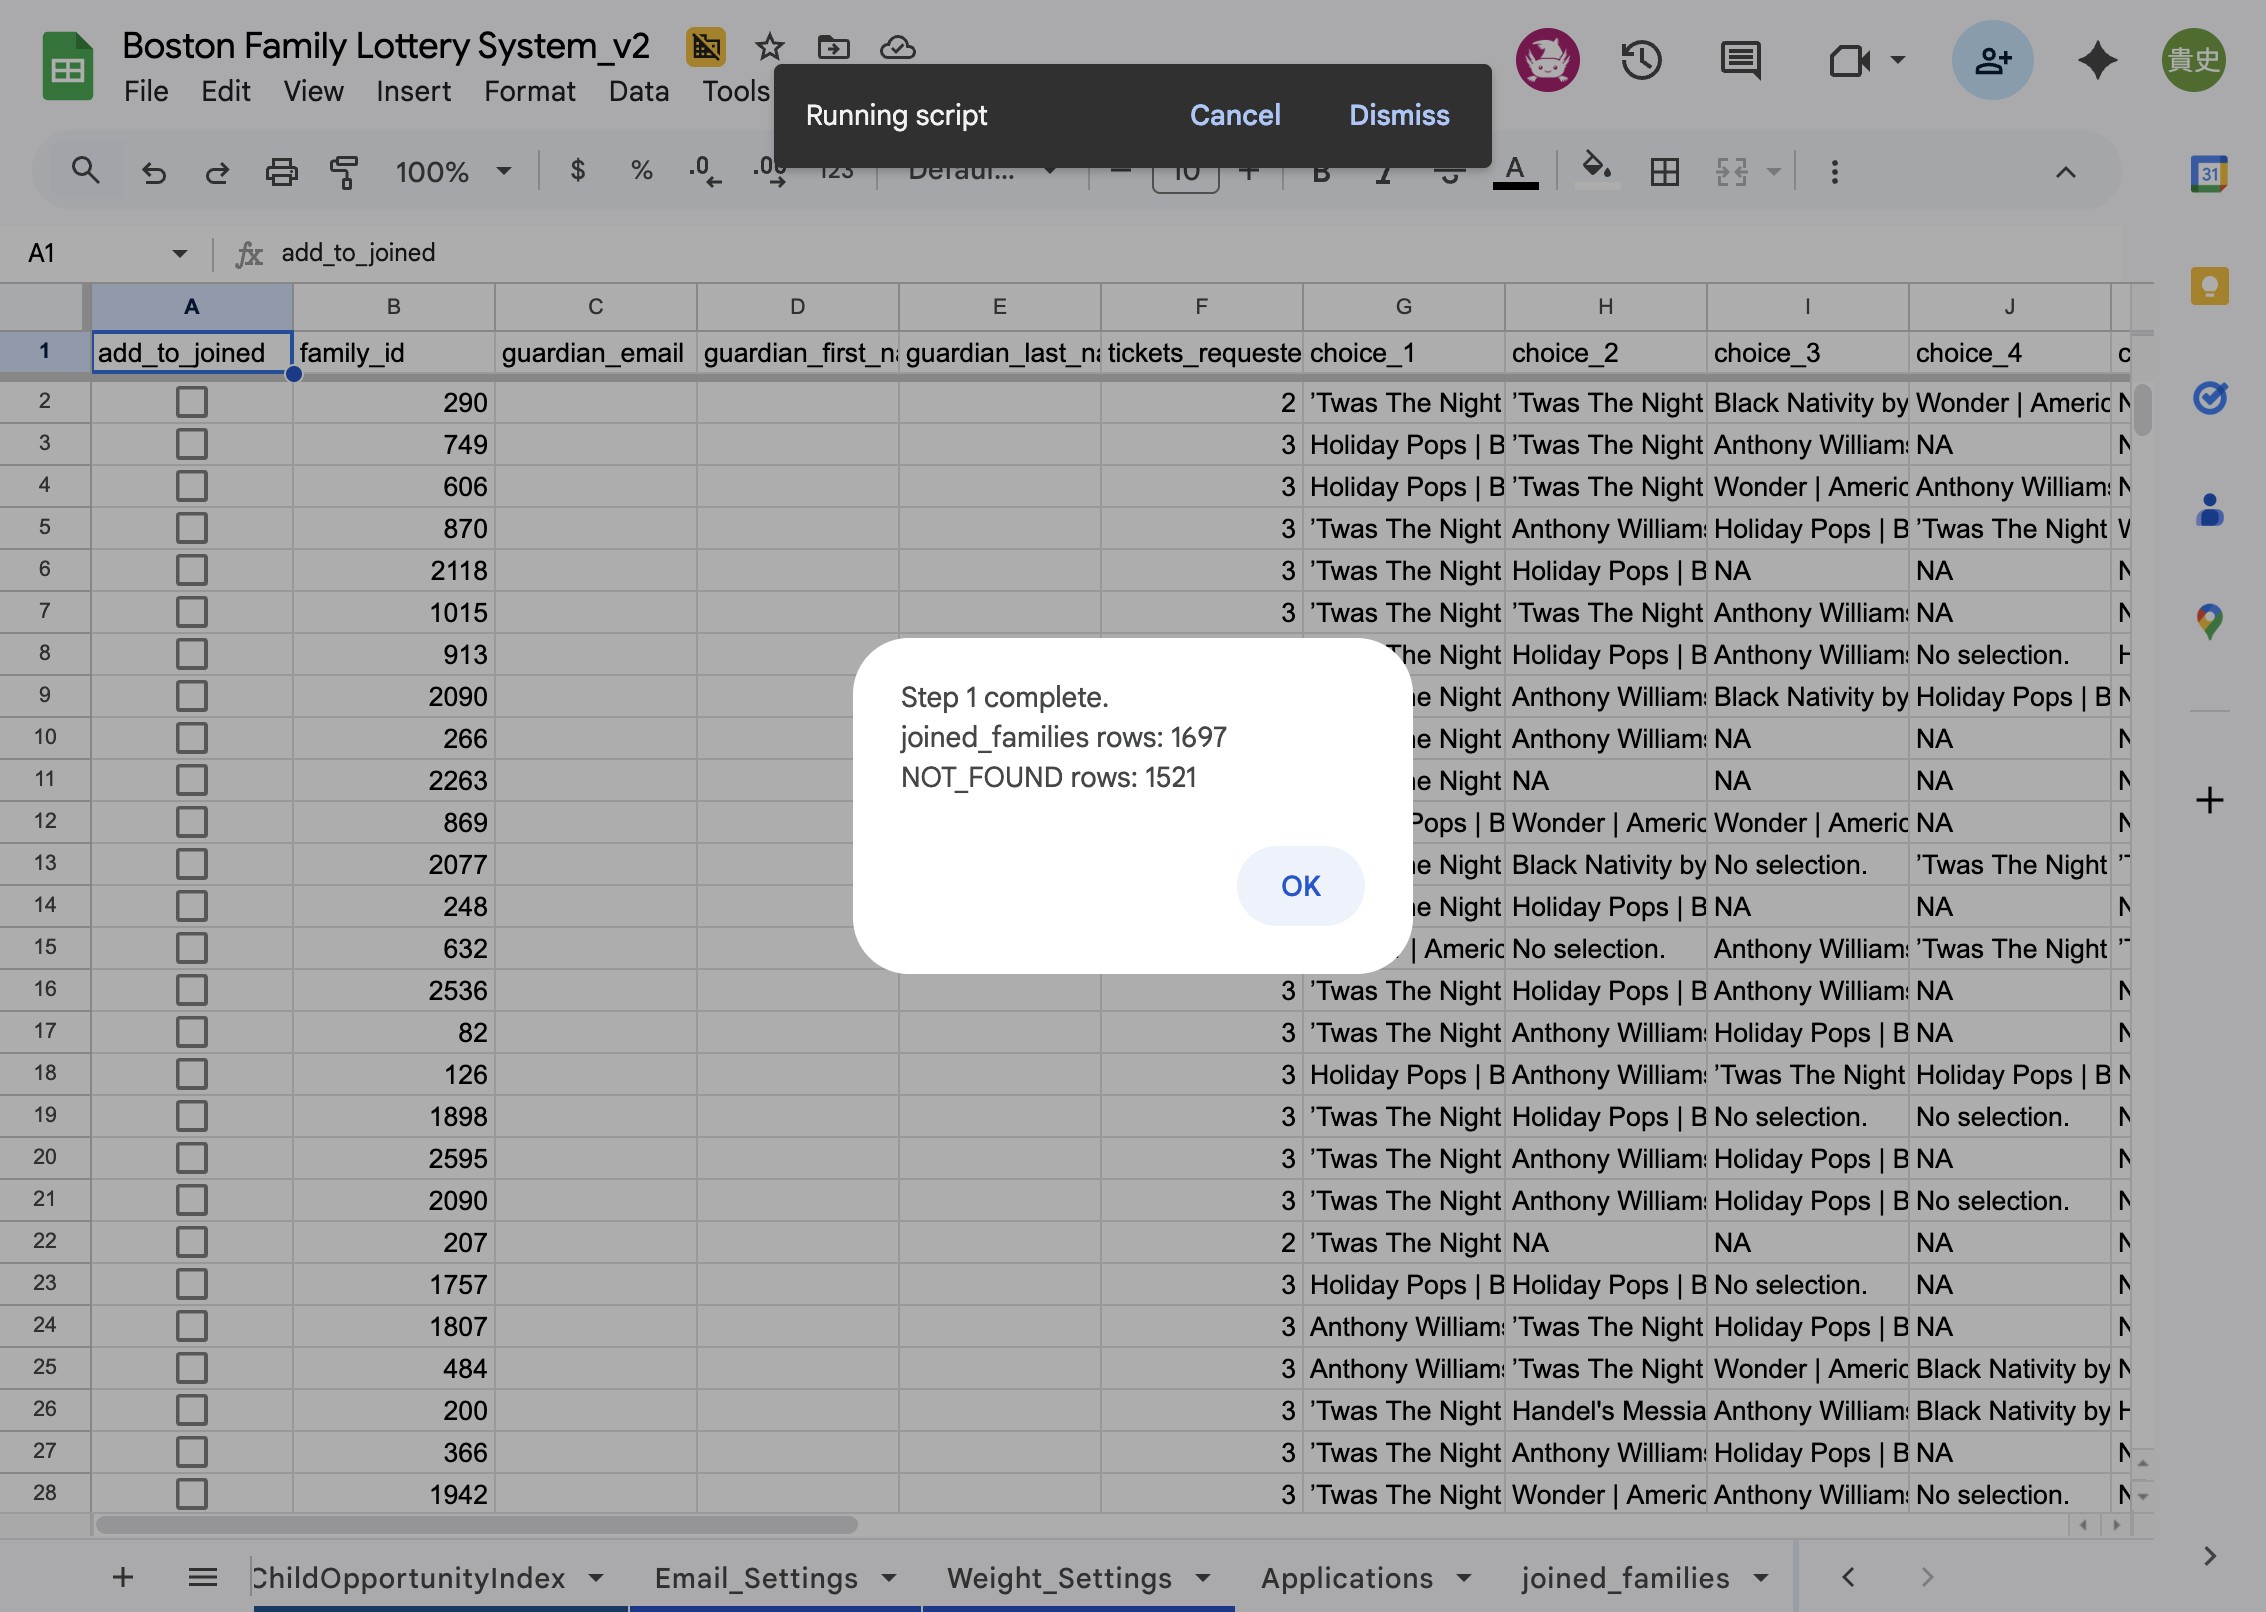
3
Step 3: Click OK when the completion message
appears.
4
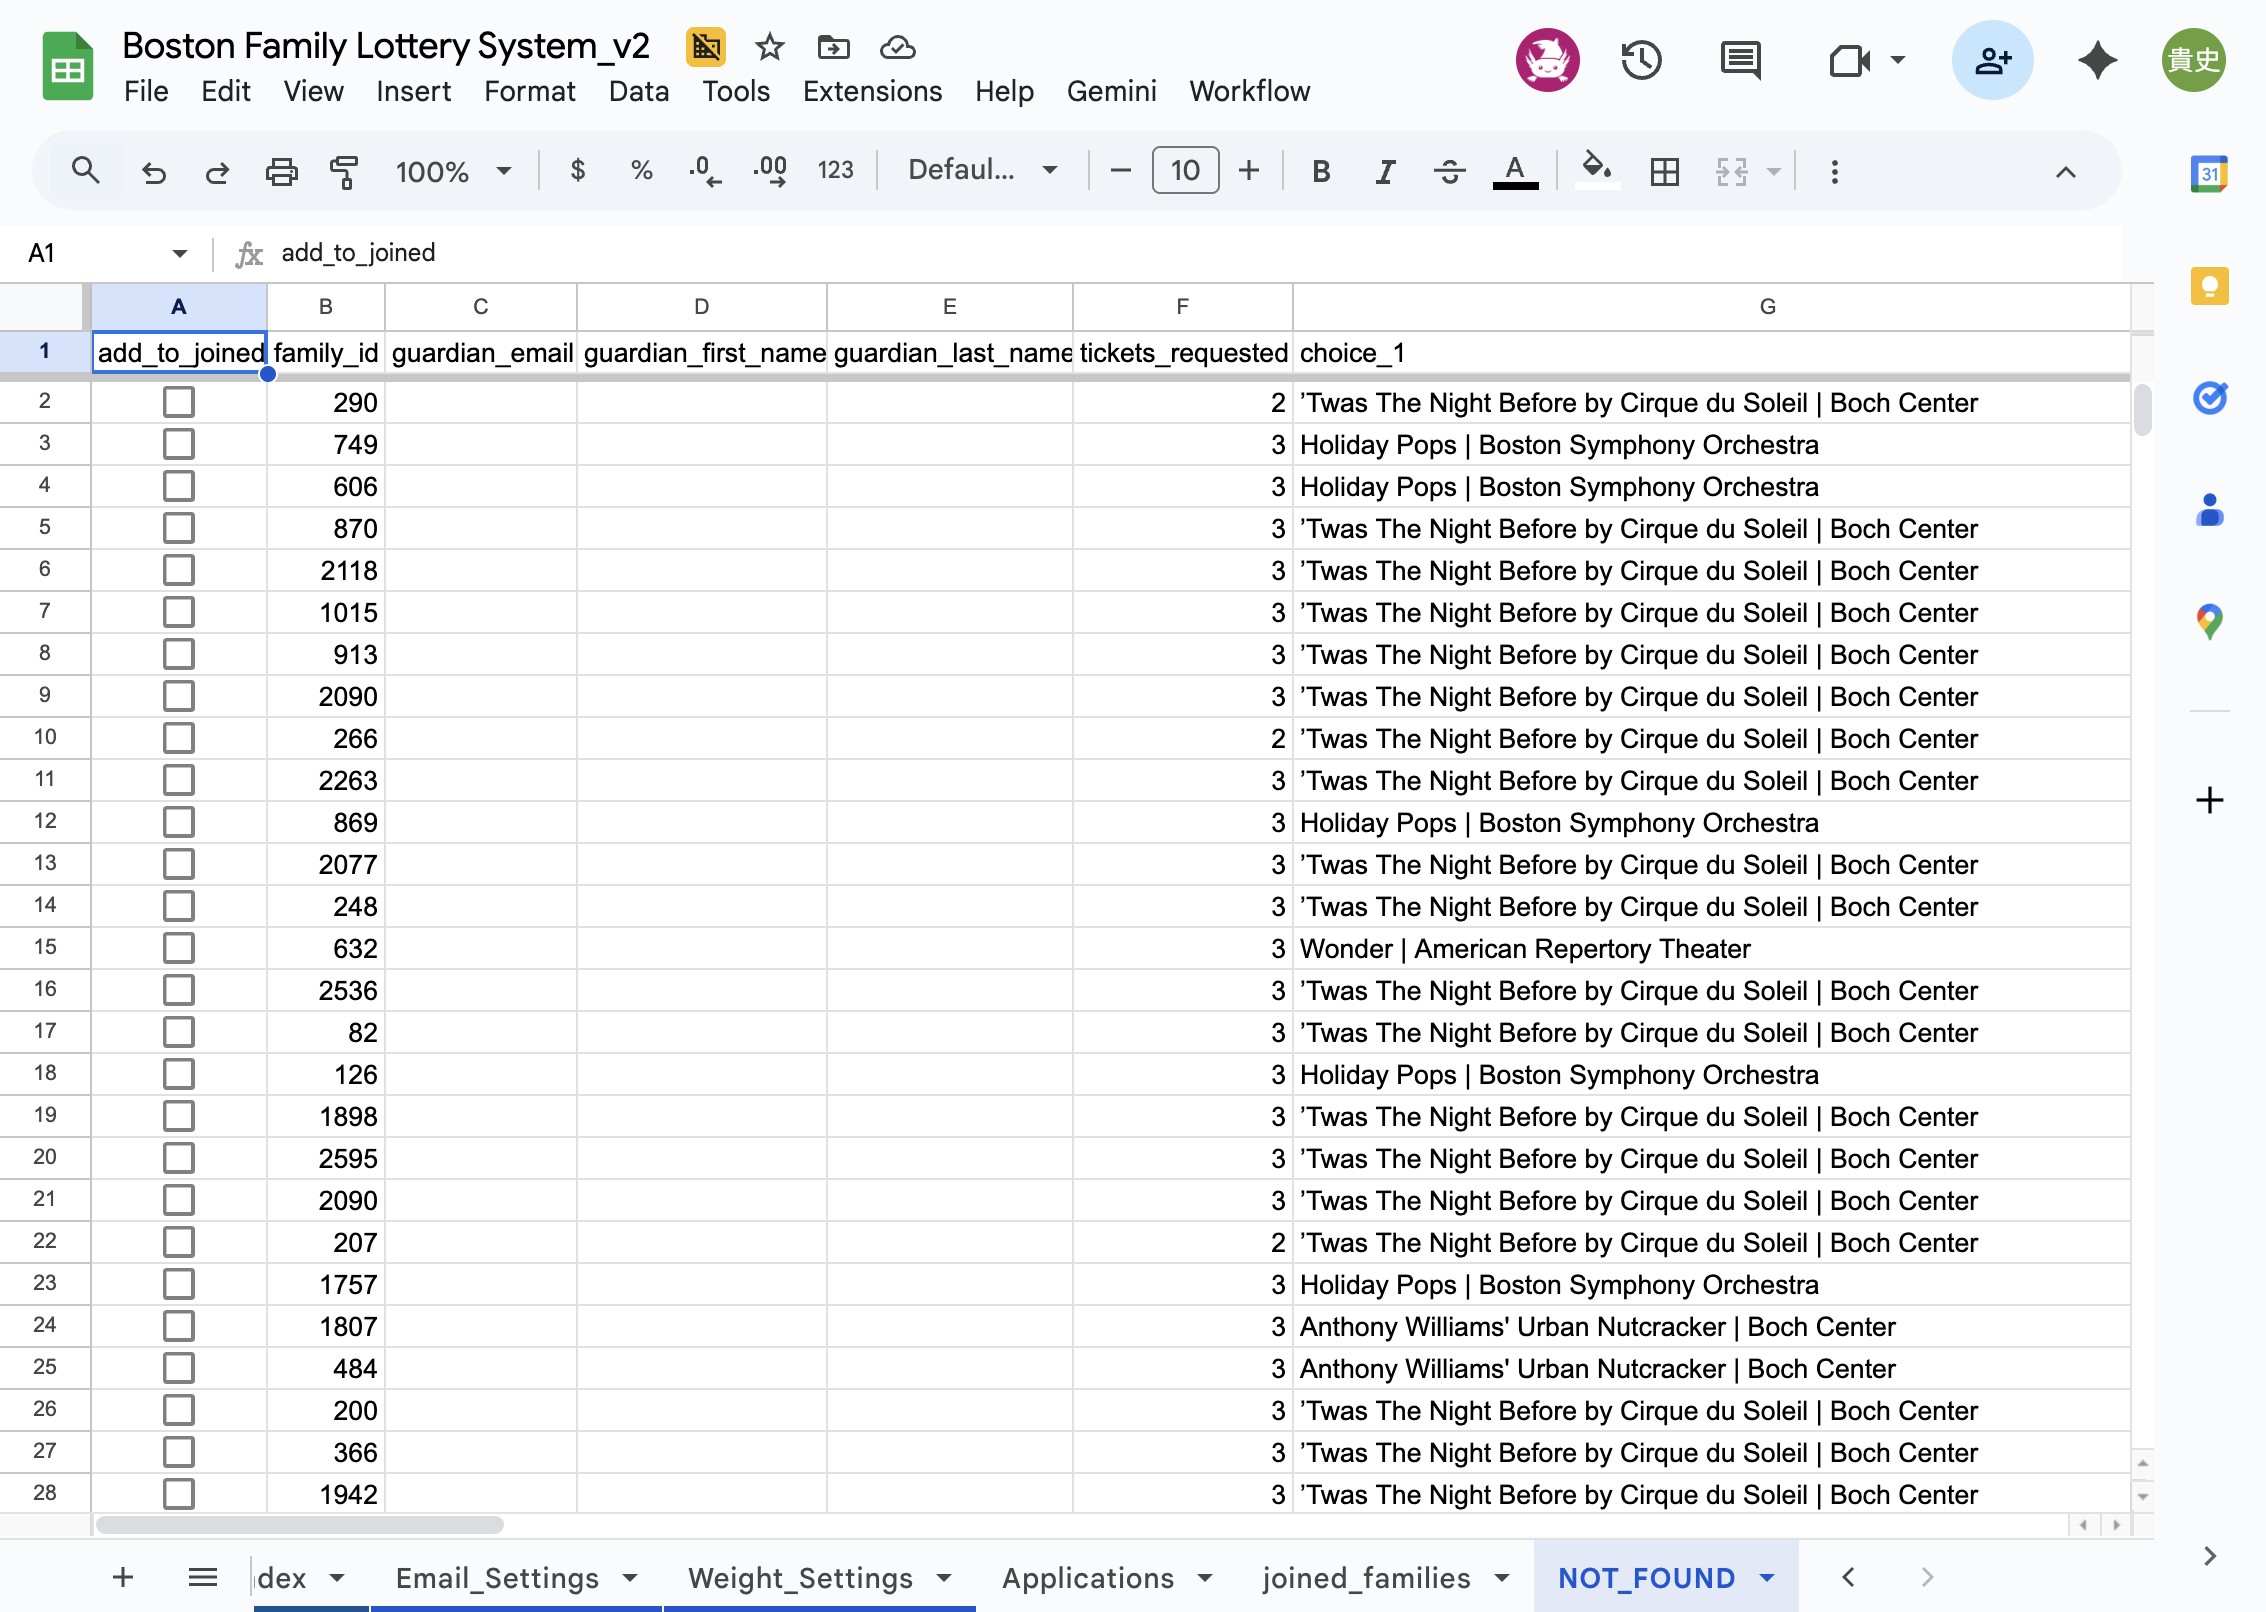
Step 4: Switch to the NOT_FOUND sheet and review each
family ID that couldn't be validated automatically. For
each row:
- Manually look up the correct Family ID in your Family Directory
- Replace the current ID with the correct one
- Check the checkbox in Column A to mark it as verified
5
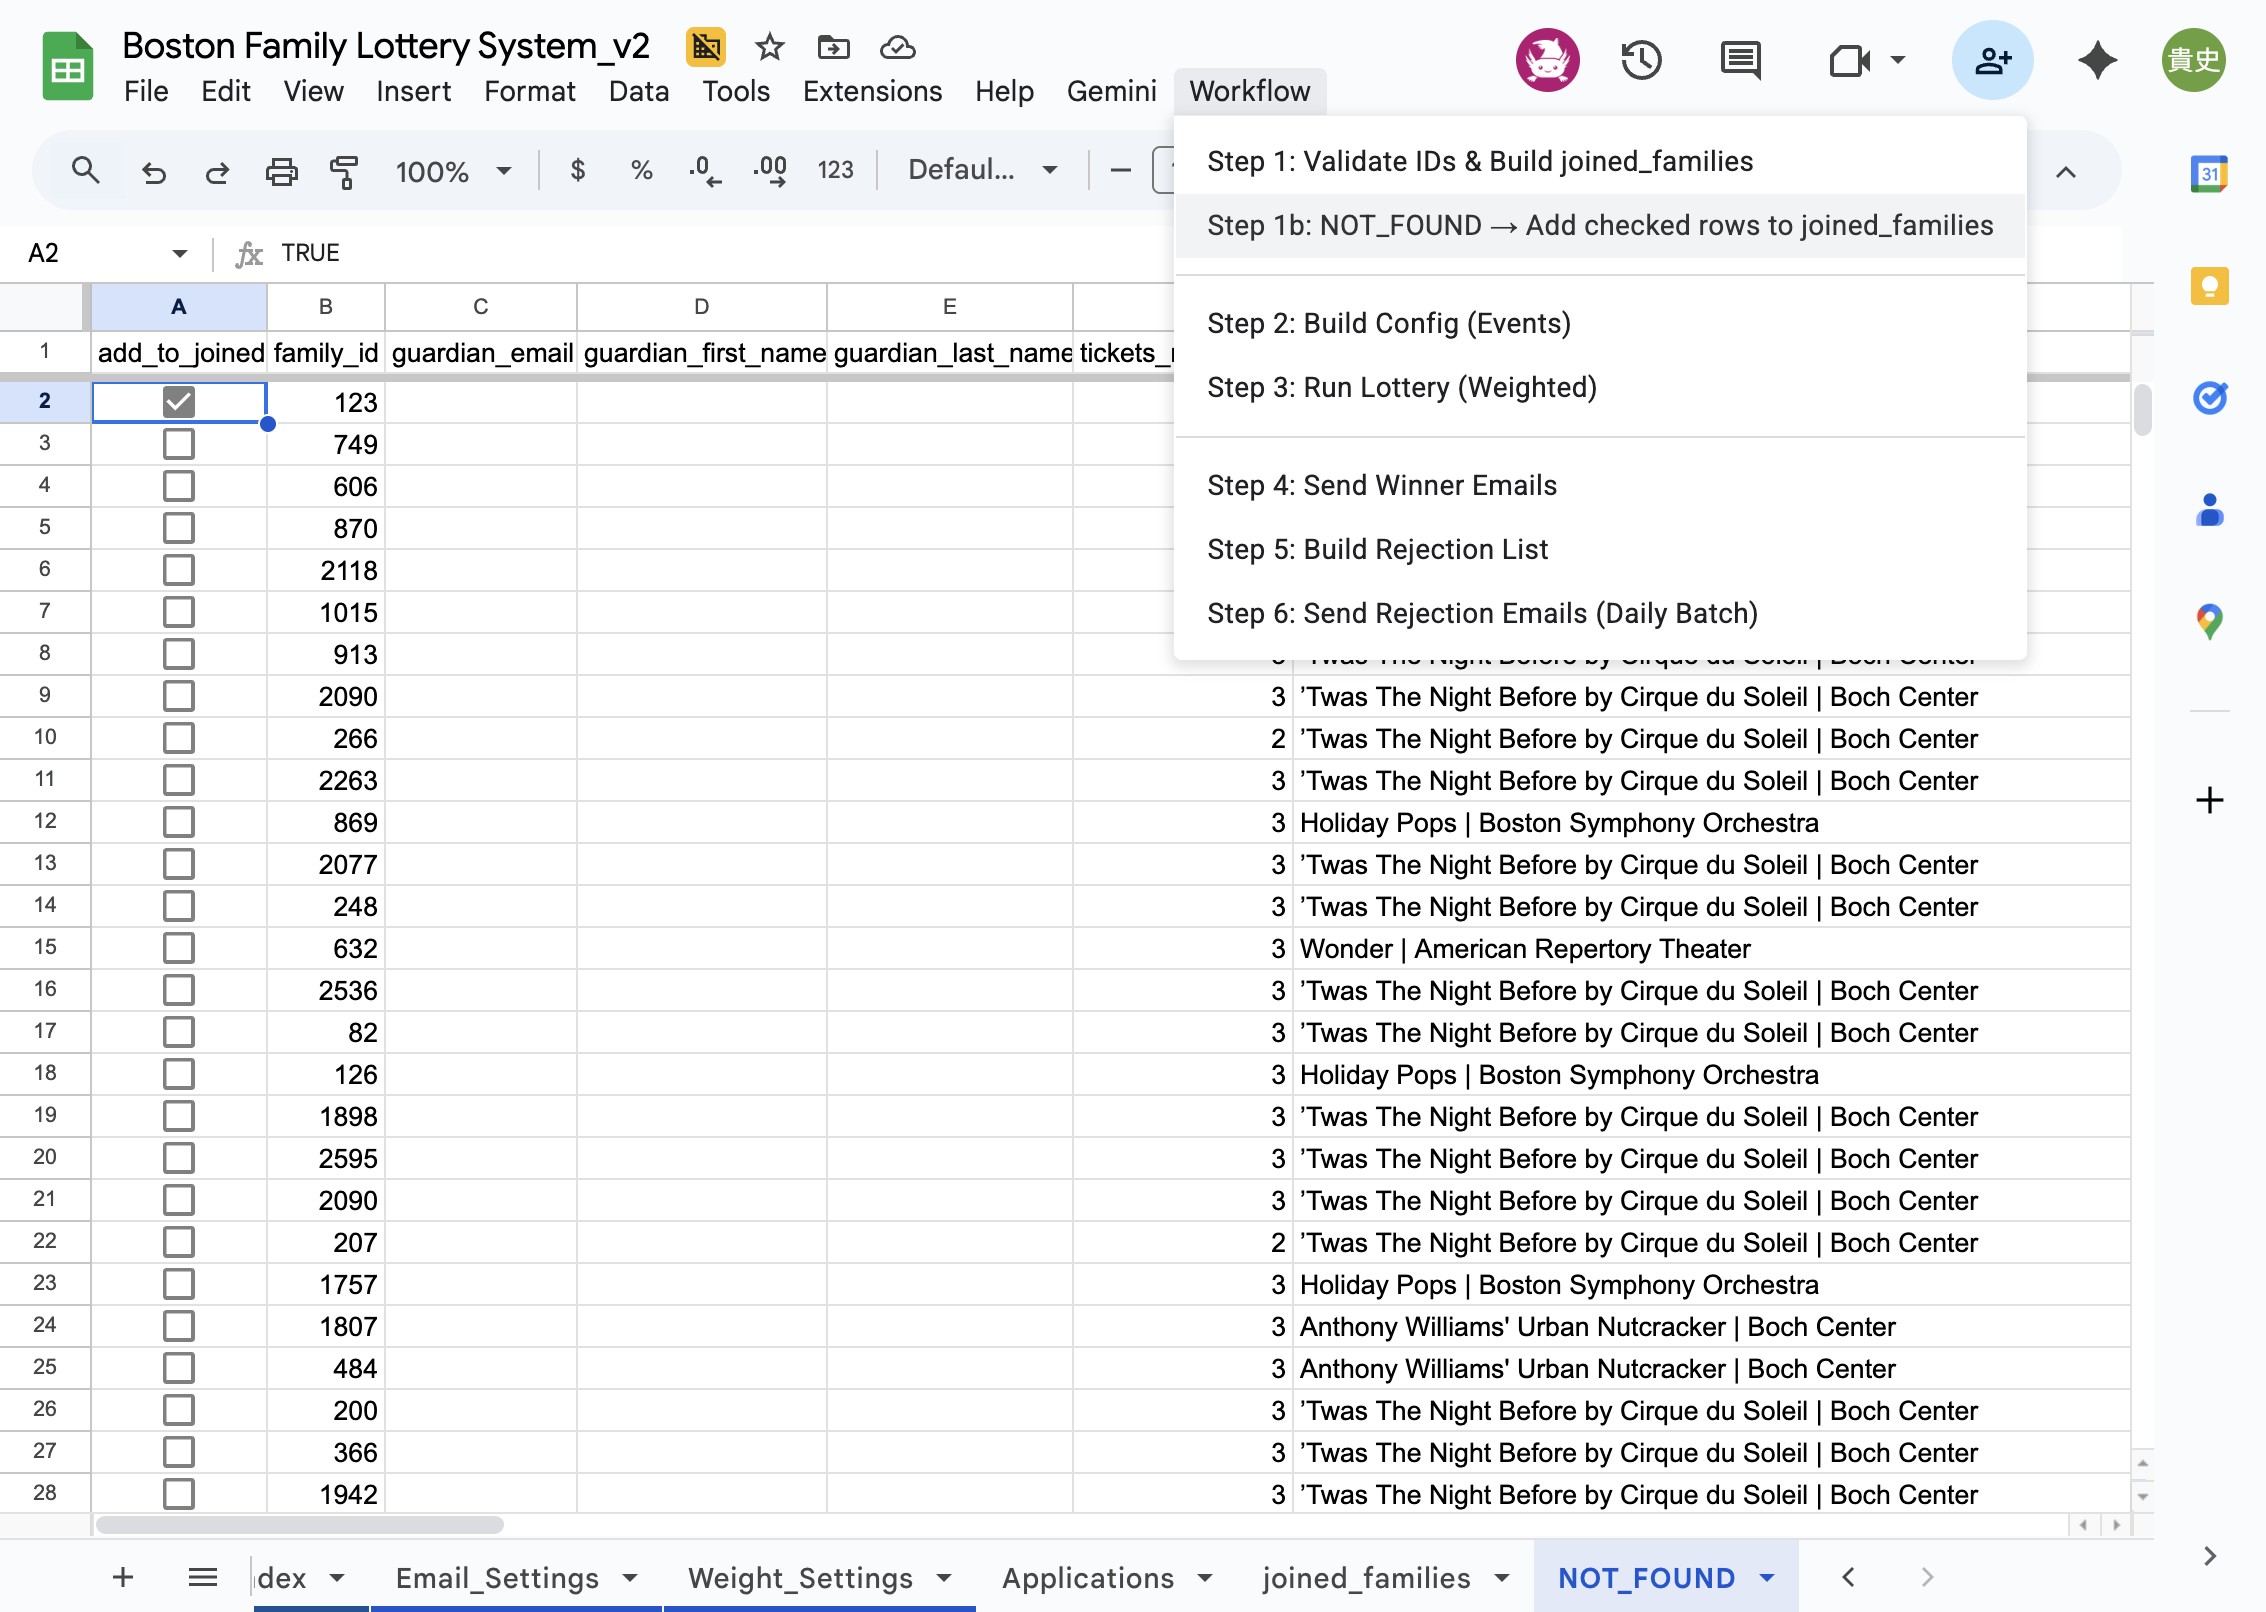
Step 5: Return to the Workflow menu and select 'Step 1b:
NOT_FOUND → Add checked rows to joined_families'. This
will move all the manually verified IDs from the NOT_FOUND
sheet into the joined_families sheet.
6
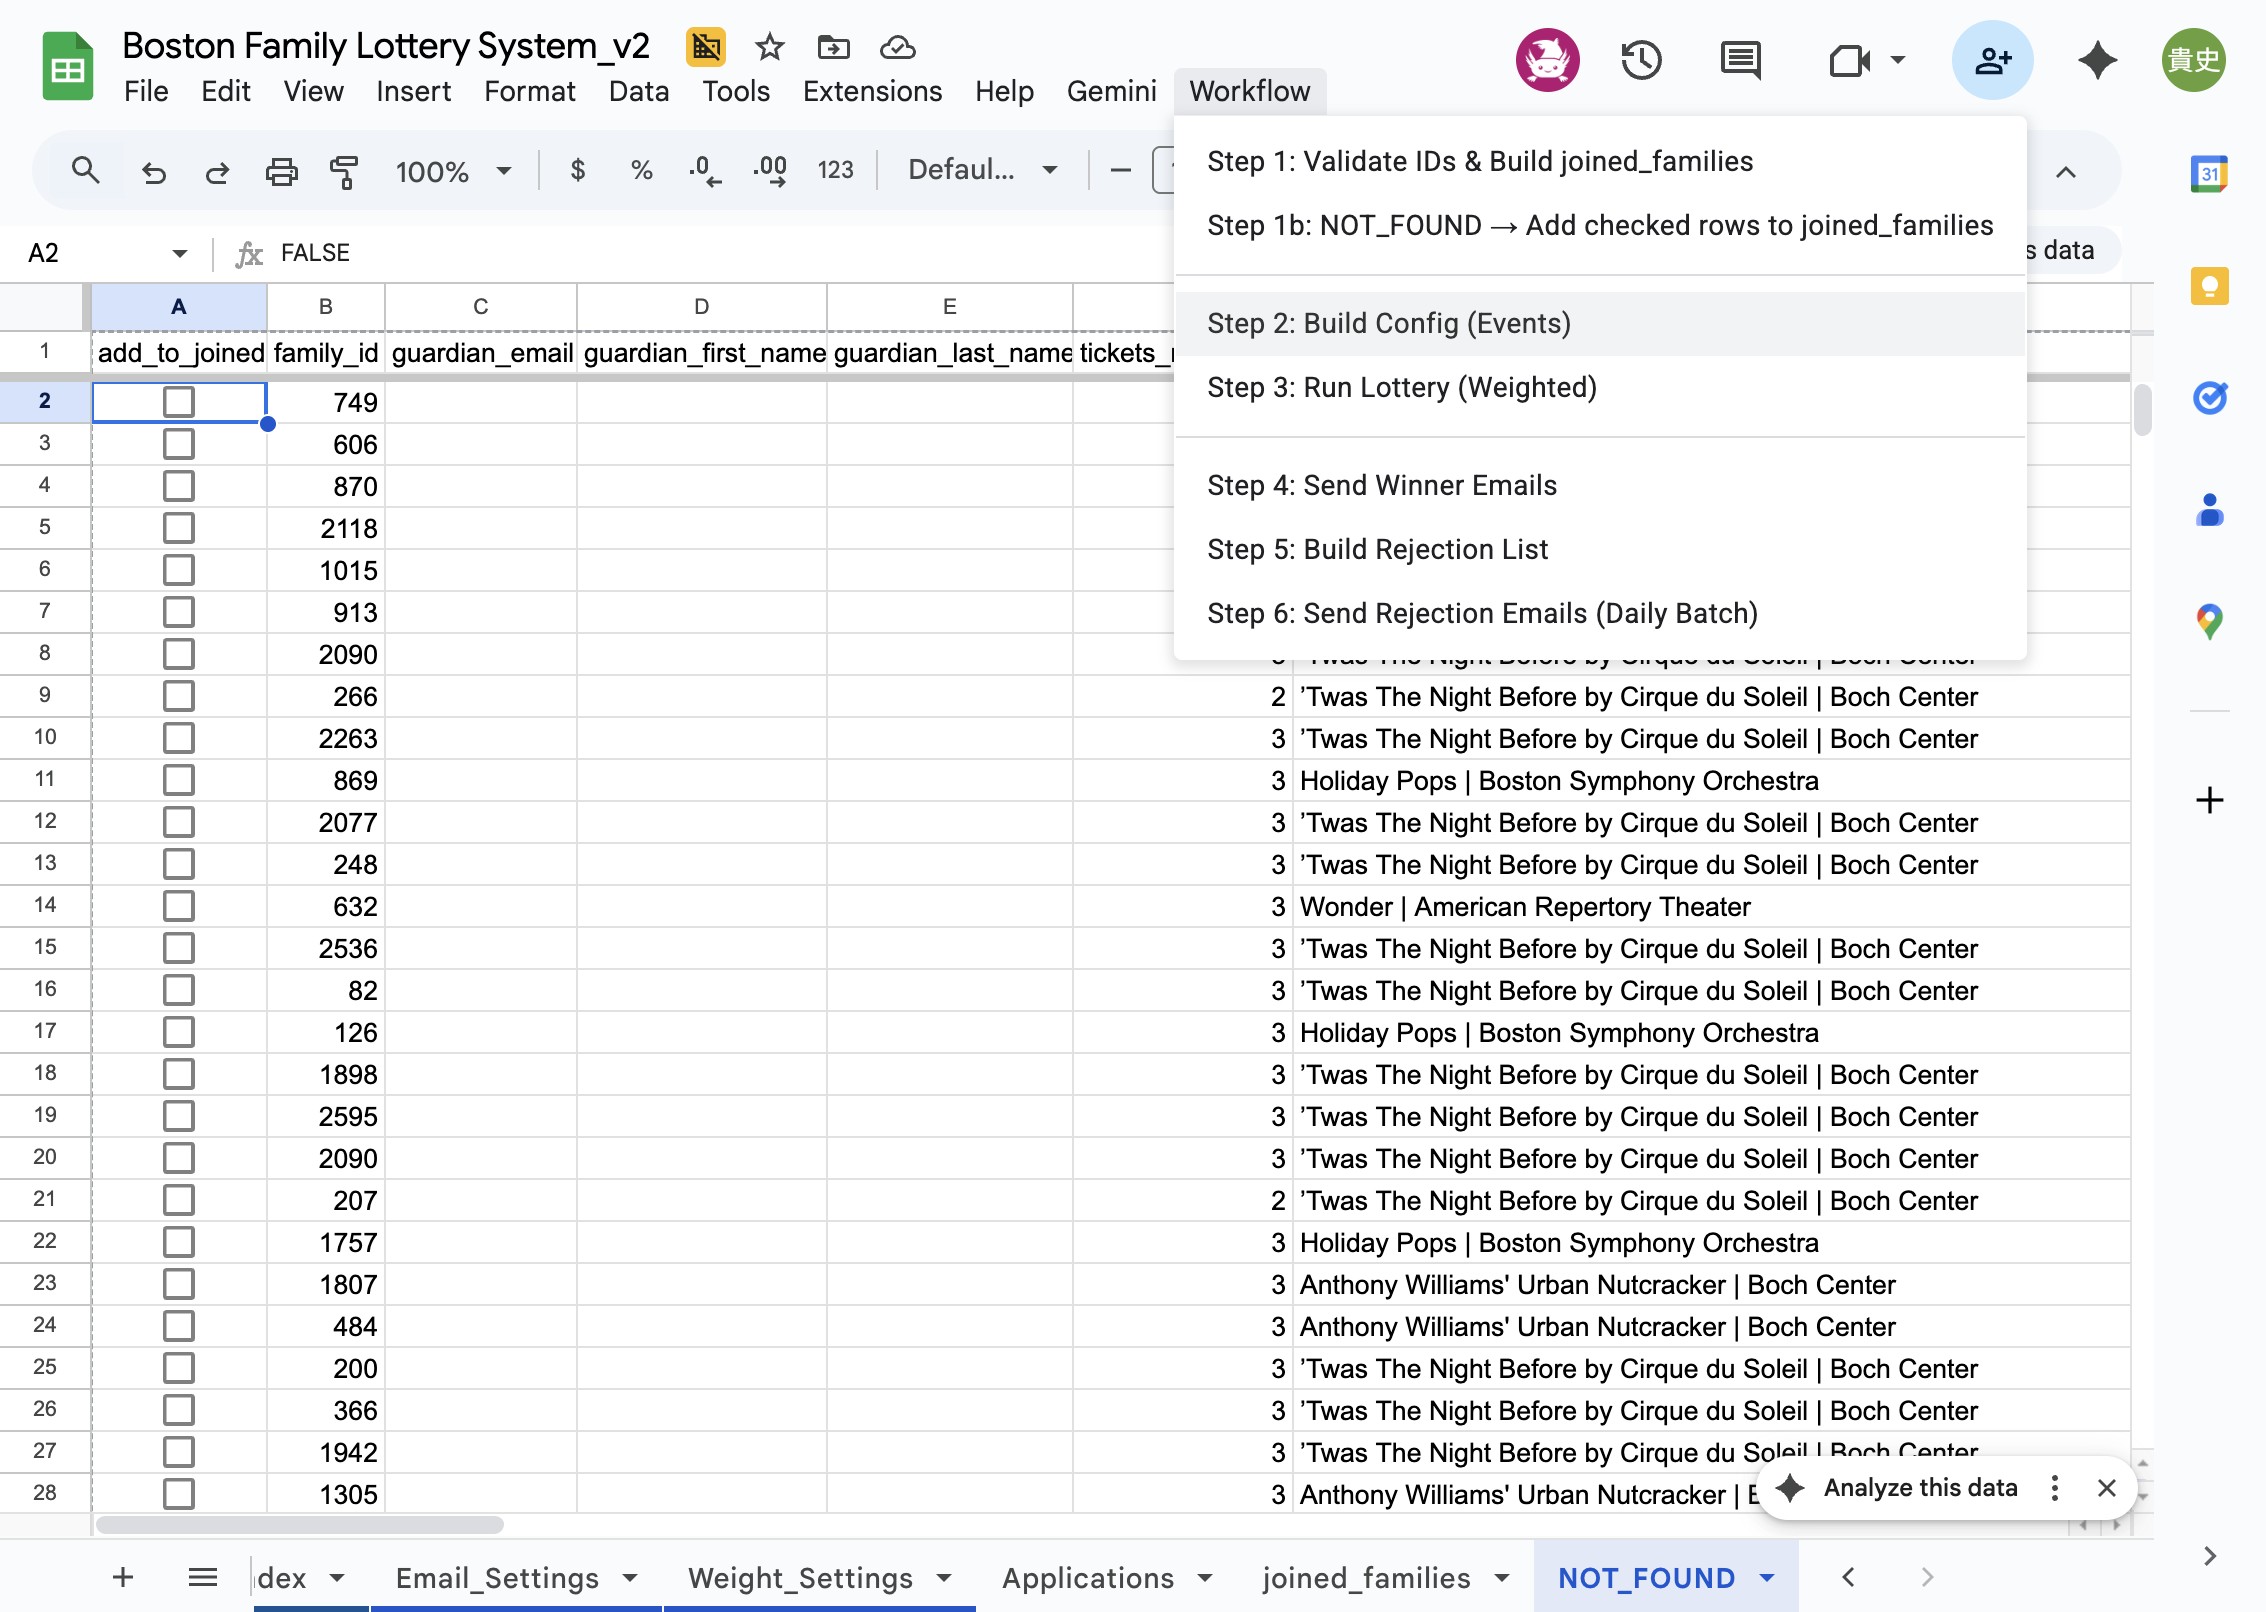
Step 6: Go to the Workflow menu and select 'Step 2: Build
Config (Events)'. The system will extract all unique
events from the submissions and create a Config
sheet.
7
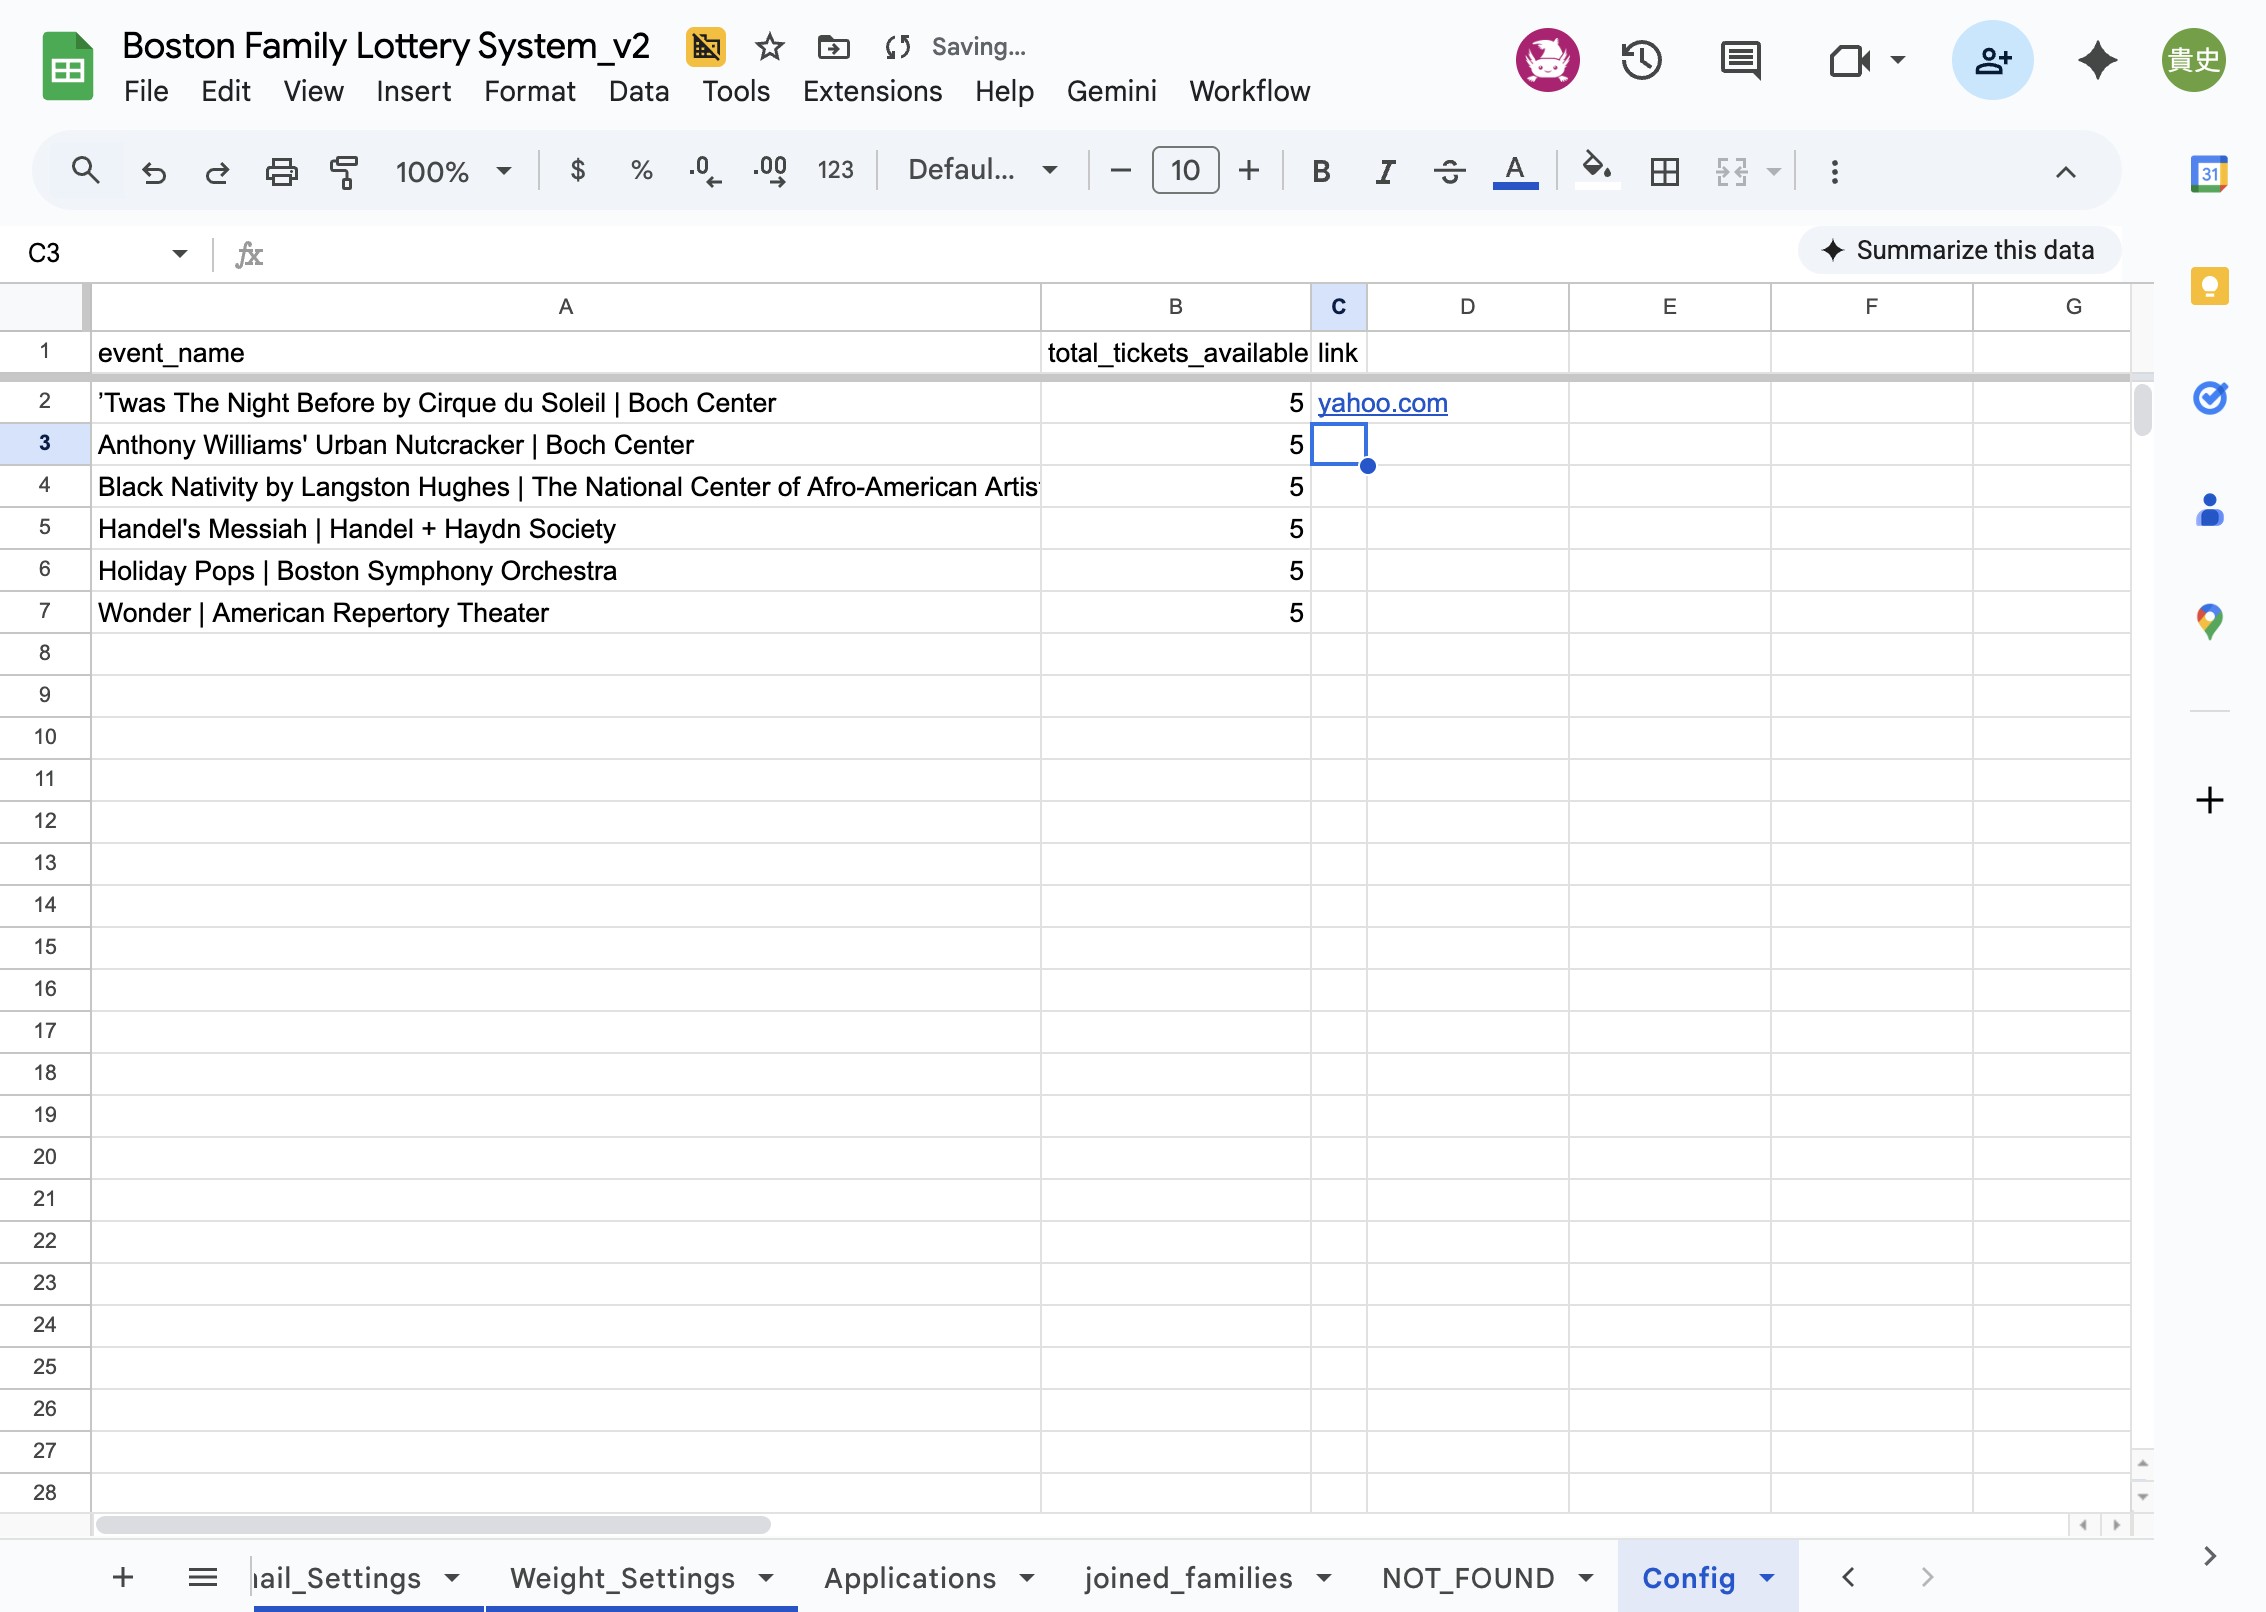
Step 7: Open the Config sheet and manually input the
following for each event/performance:
- Number of available tickets per performance
- Signup links that will be sent to each winner for ticket reservation
8
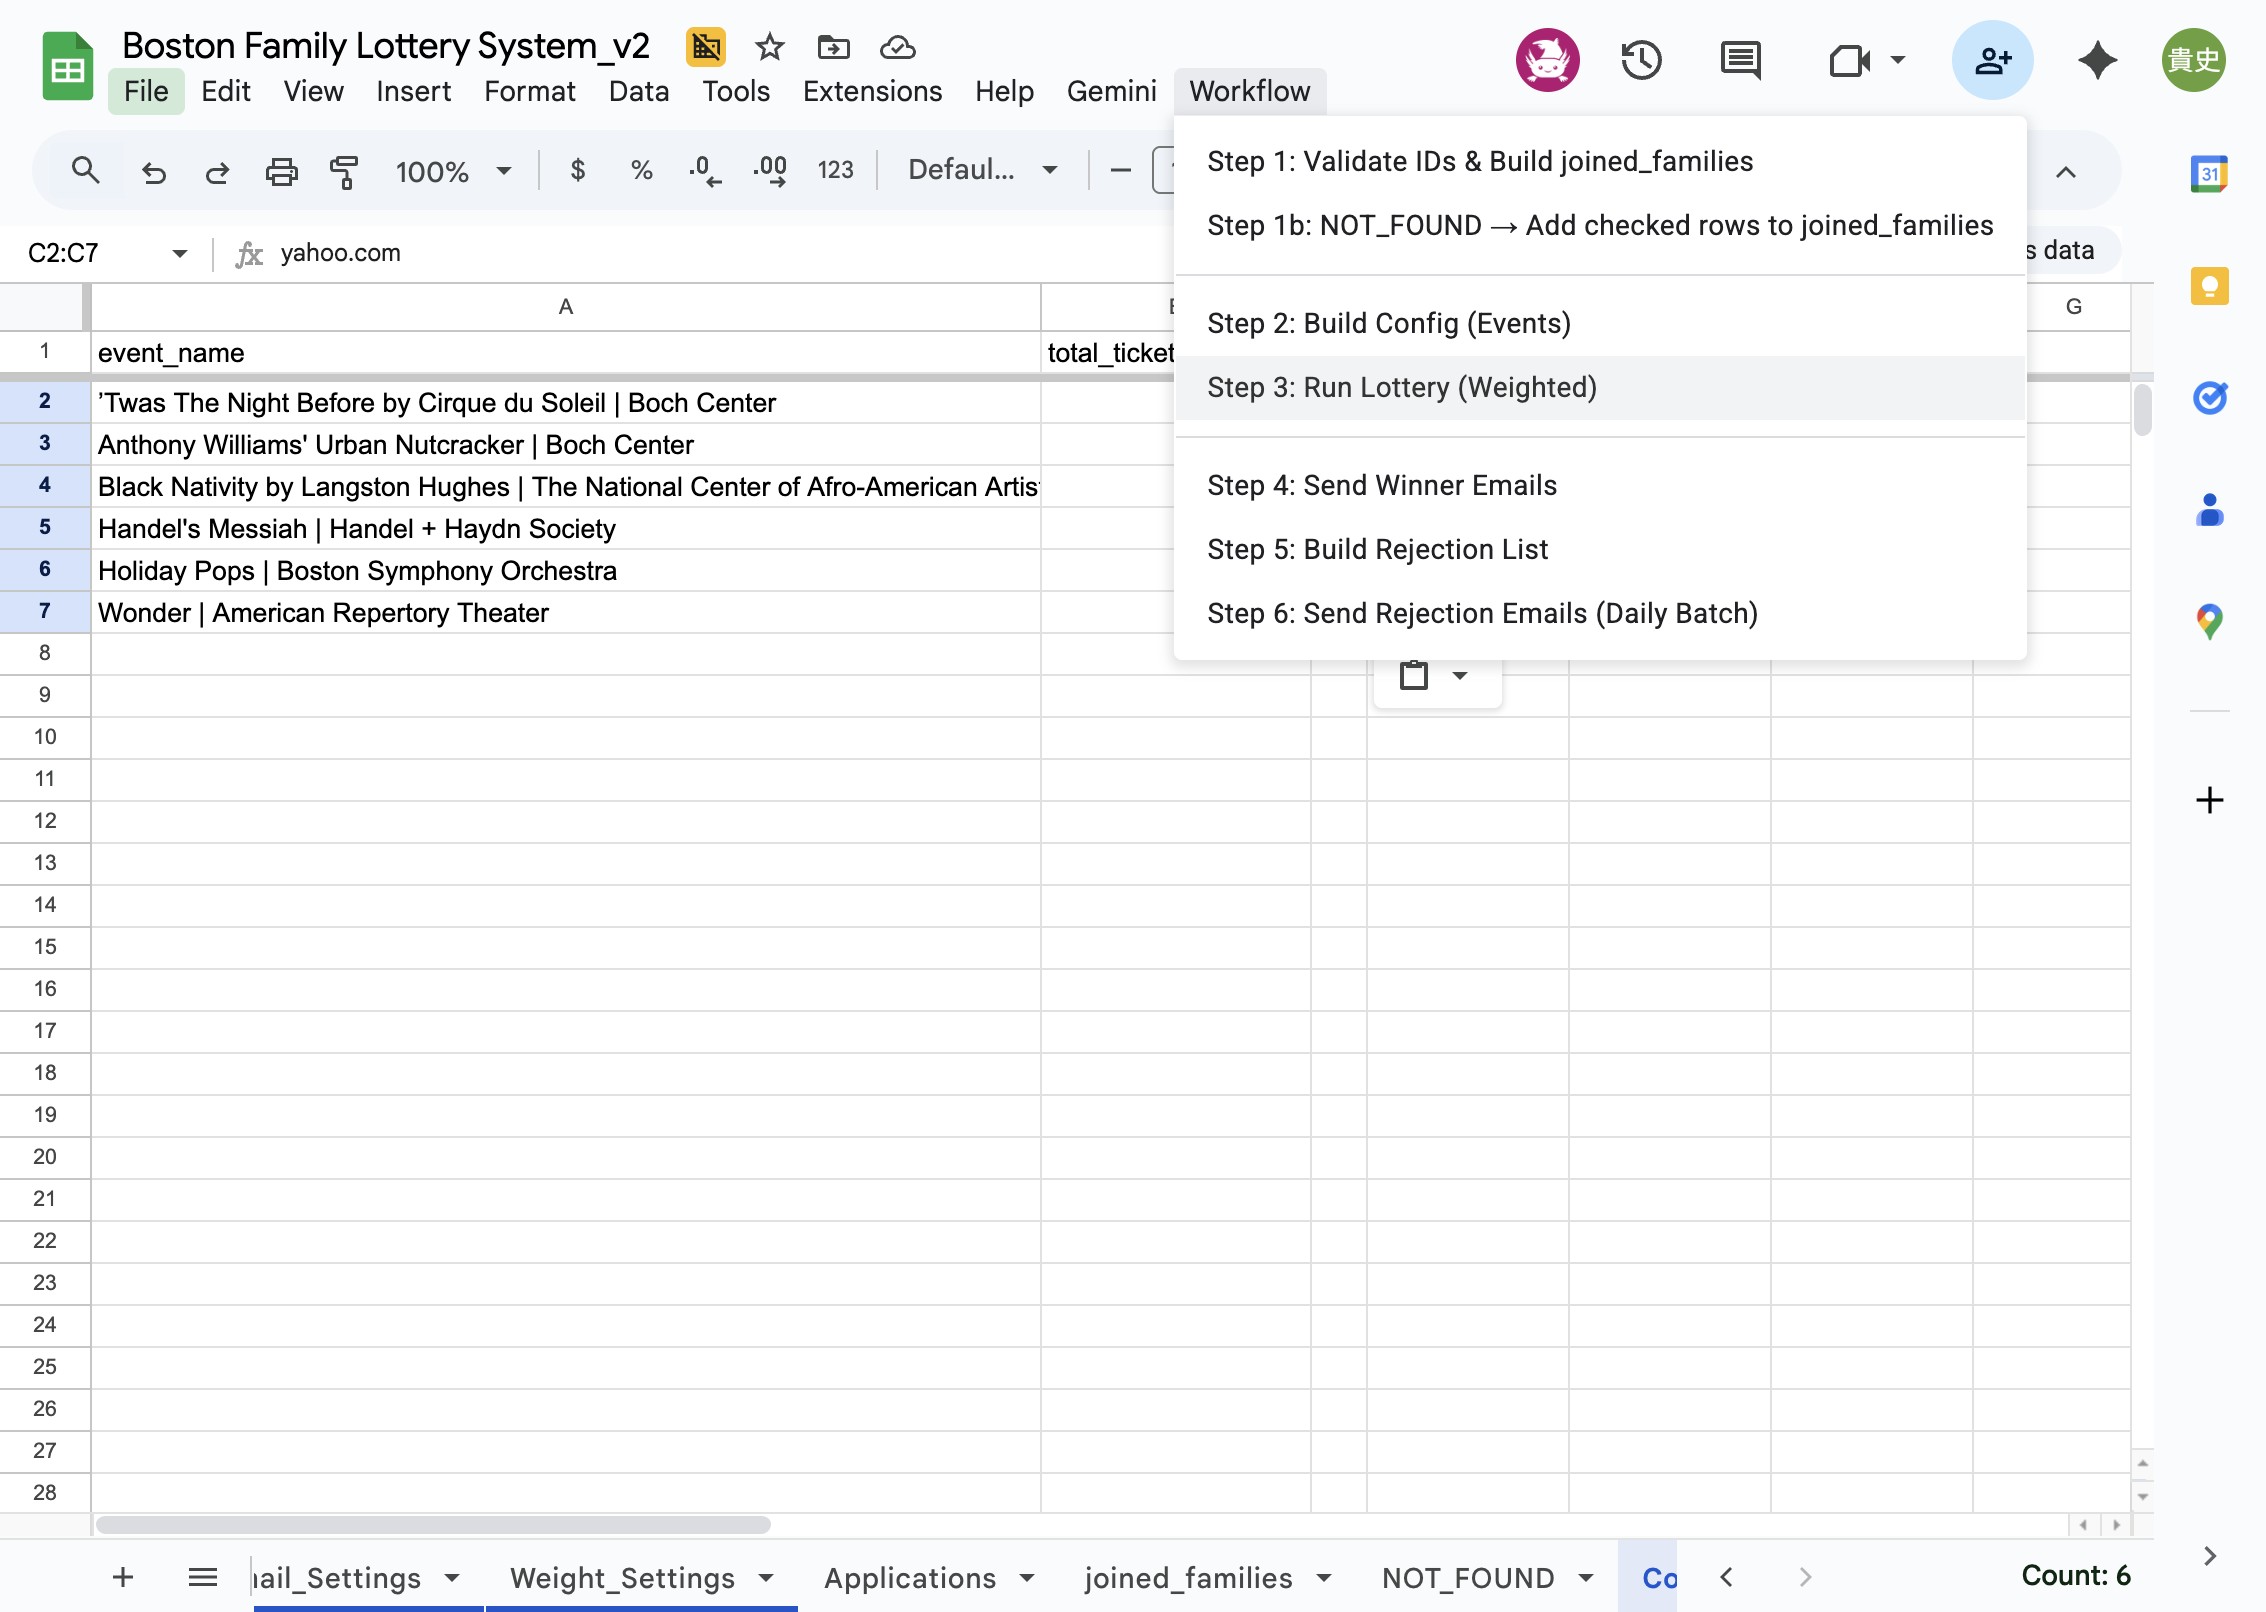
Step 8: Go to the Workflow menu and select 'Step 3: Run
Lottery (Weighted)'. This will process registrants'
first-choice preferences, weight them based on past wins
and equity factors, and create a new LotteryResults sheet
with winners per performance.
9
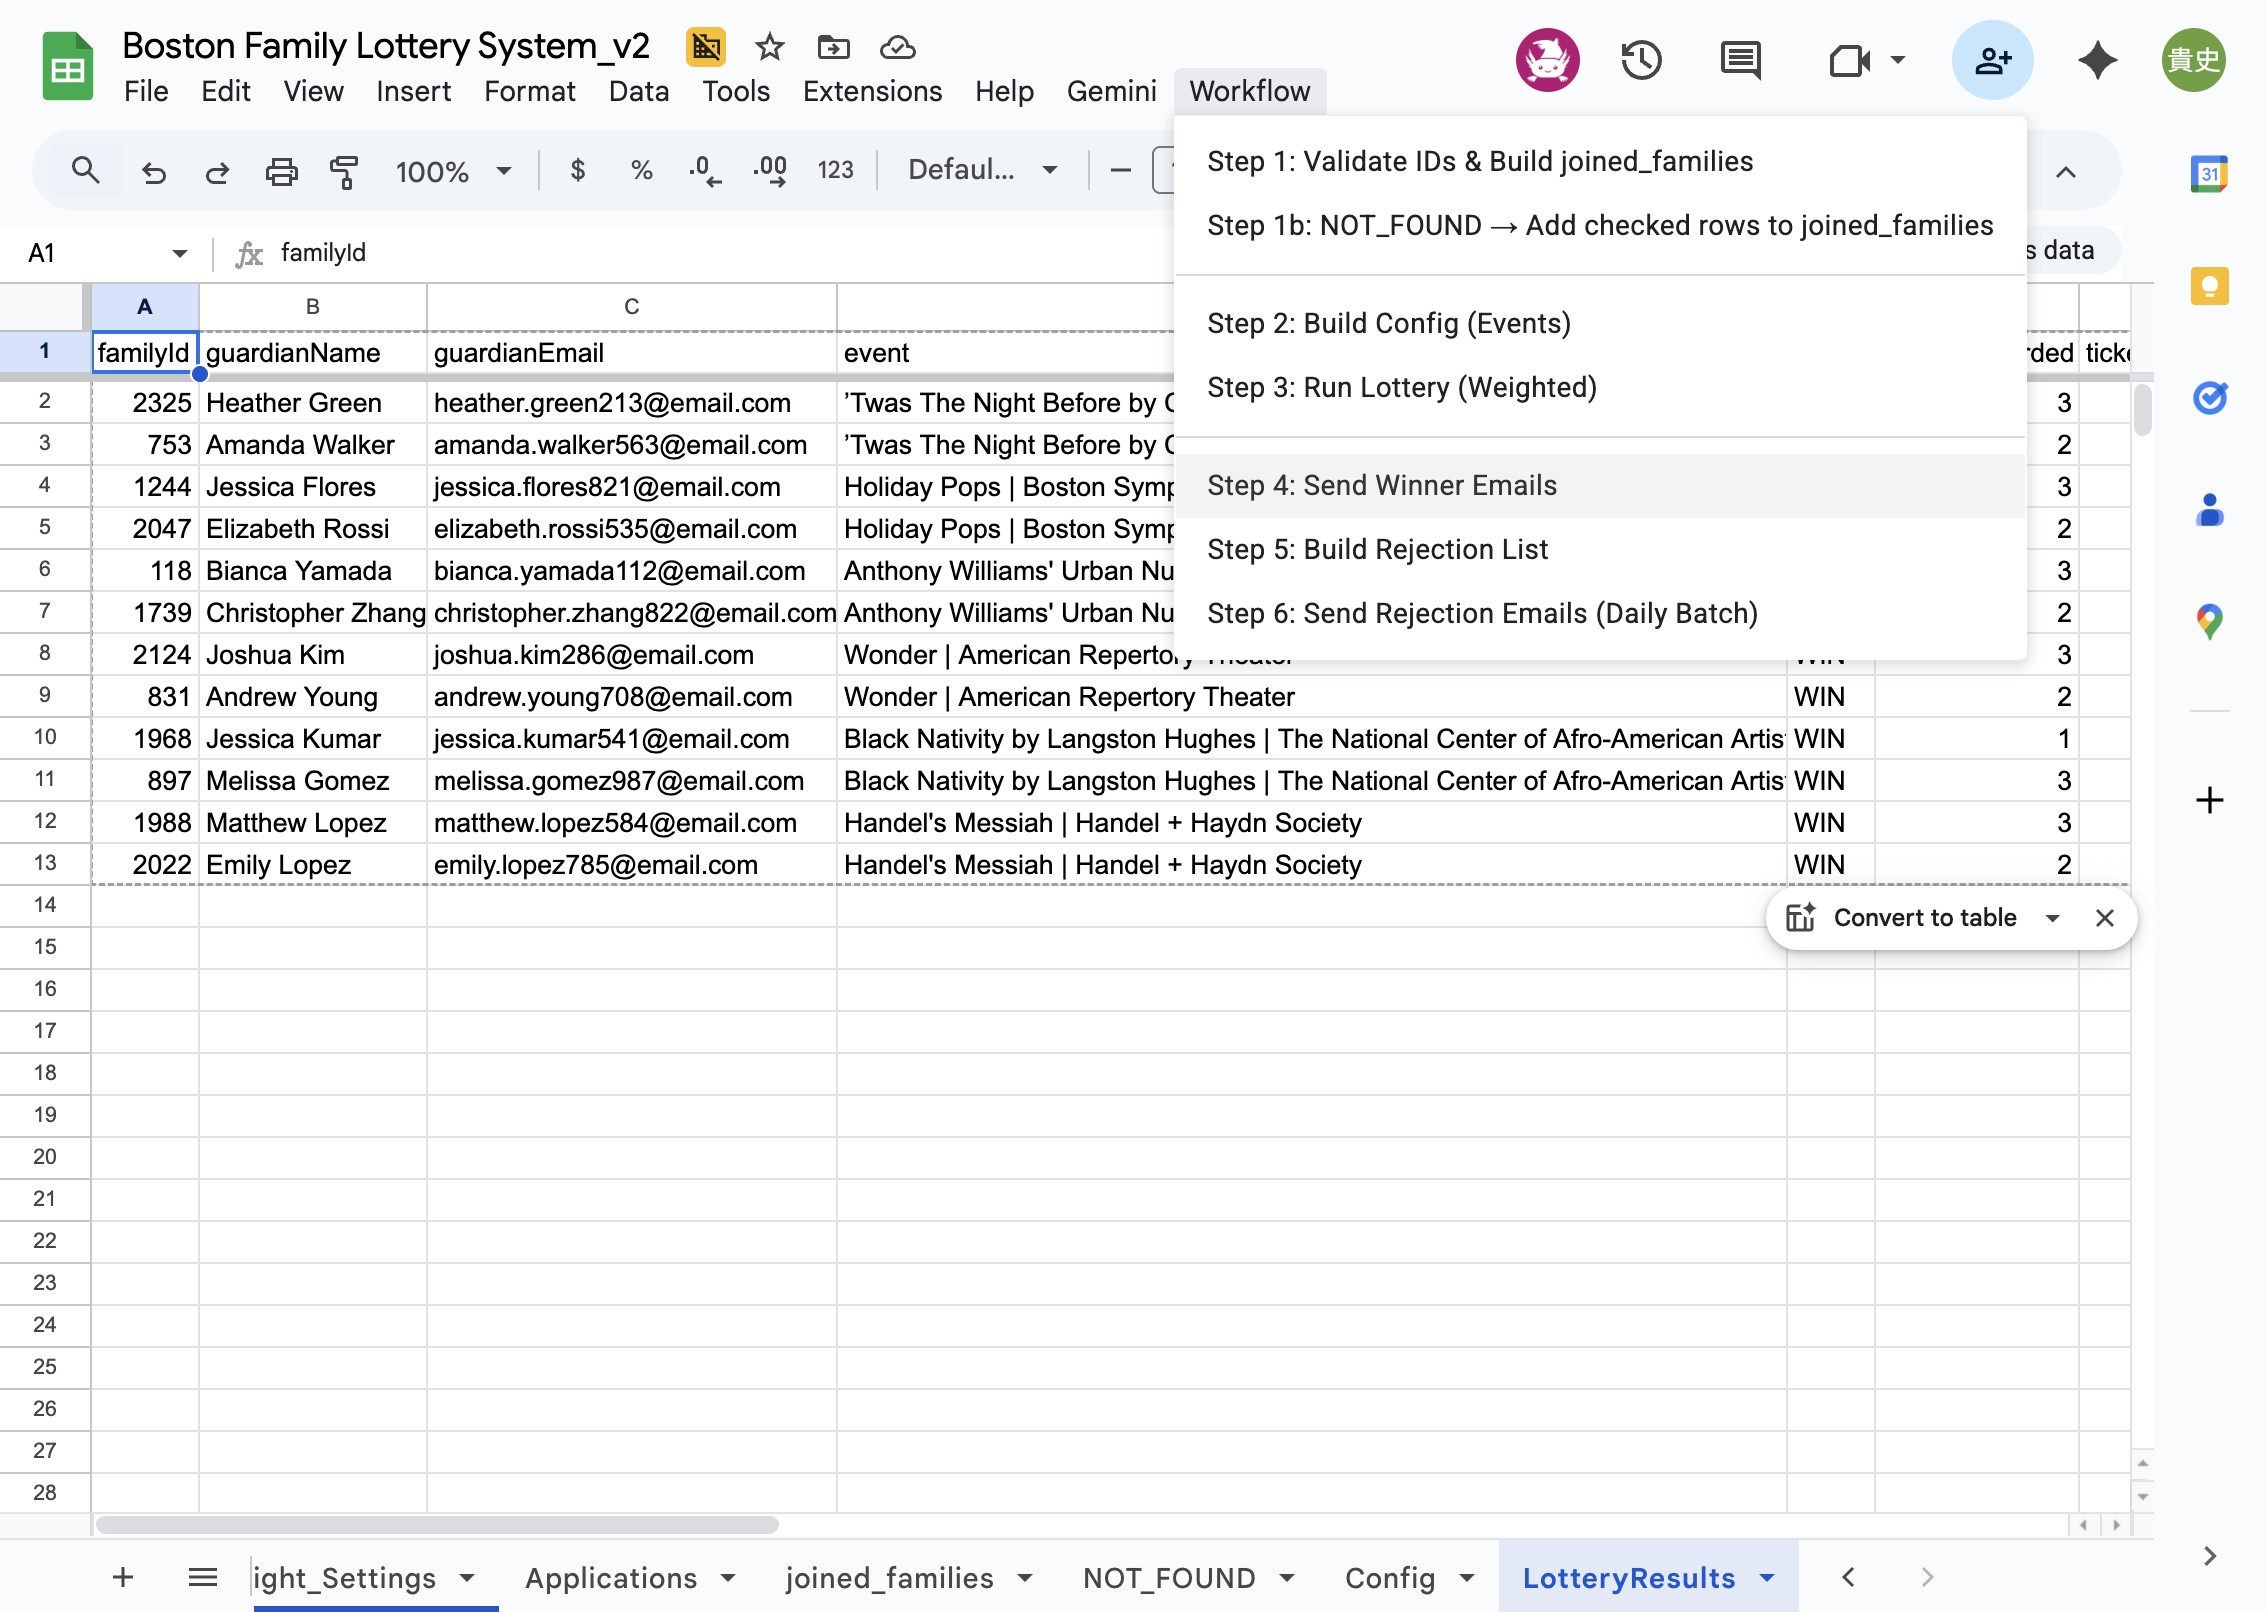
Step 9: Important: Before running this step for testing, prepare
your email text in the Email_Settings sheet.
Go to the Workflow menu and select 'Step 4: Send Winner
Emails'. The system will automatically send notification
emails to all winners with their unique signup link
attached.
*For the demonstration/testing, please replace the top 1-2 emails with your own.*
*For the demonstration/testing, please replace the top 1-2 emails with your own.*
10
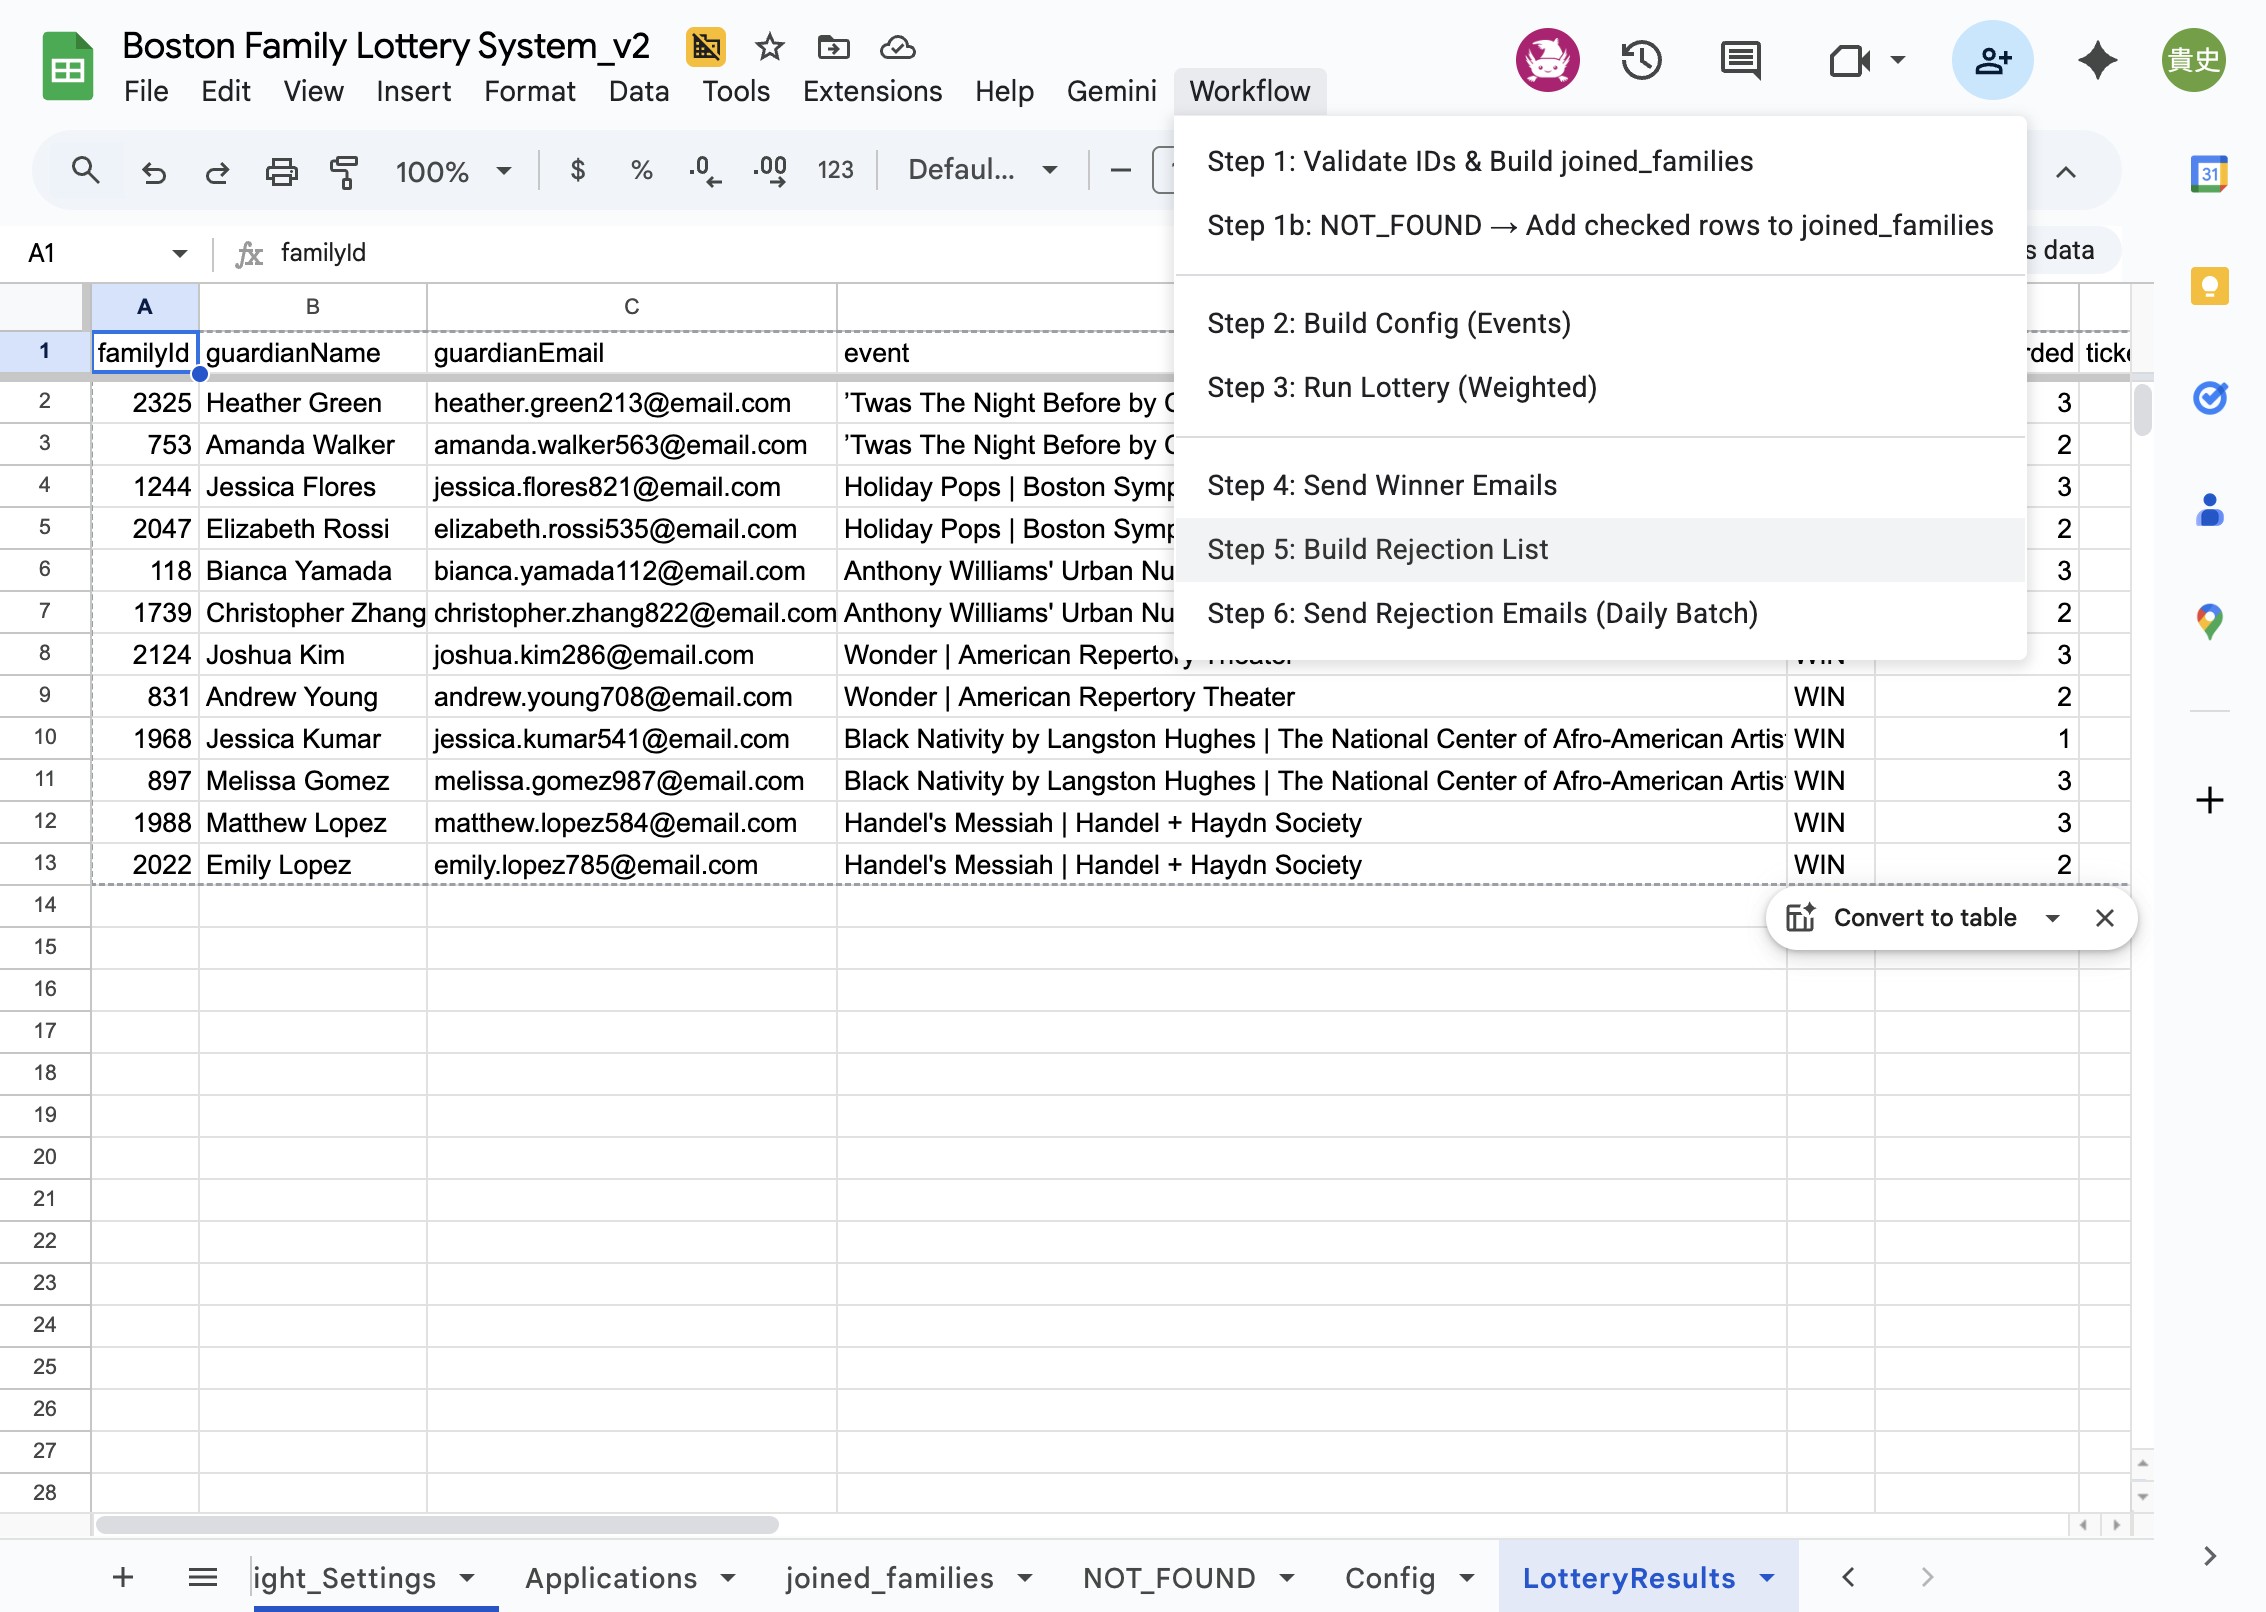
Step 10: Go to the Workflow menu and select 'Step 5:
Build Rejection List'. This creates a comprehensive list
of all applicants who did not win the lottery, including
details.
11
Step 11: Go to the Workflow menu and select 'Step 6: Send
Rejection Emails (Daily Batch)'. This step automatically
sends rejection emails in batches over multiple days to
avoid hitting Gmail's daily sending limits. The system
will track which emails have been sent and automatically
continue where it left off if you need to run this step
multiple times.